Creating smooth lines in Photoshop. How to draw a line in Photoshop
Parallel lines and a grid are elements that bring order and rigid structure to a design solution. Lines set the direction for the eye as it fleetingly glides across the picture, emphasizing the surfaces, giving volume to the image. Light shading instead of filling creates the effect of weightlessness and airiness of the object.


It is easier to create parallel lines, a grid of rectangular cells, and a lattice in vector graphics programs such as Adobe Illustrator, for example. You can download a suitable texture or ready-made clipart.
But there is not always time to look for the right textures. Drawing a straight line is easy - draw with any drawing tool while holding down the Shift key. It's difficult to draw multiple lines equally spaced to create a grid, for example. But to solve the problem of creating parallel lines It's not at all difficult in Photoshop.
1 way.
The fastest way to create parallel lines is to use styles.
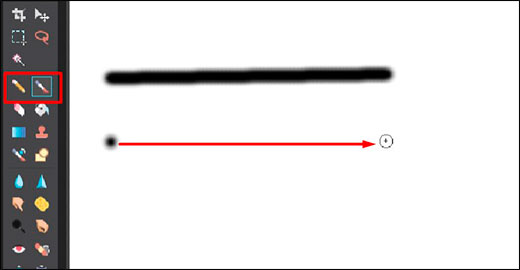
Draw a straight line with the Pensil tool (to make the line straight, hold down the Shft key).

Among the built-in Photoshop styles There are Dotted Strokes styles (dash-dotted strokes). Select these styles using the Styles palette menu: Window > Styles.

From the style sets, choose the White 1pt 2pt-Spaced Dotted No Fill style or another one if you prefer.

Let's get a line of points.

This line needs to be stretched in width and obtained from the points of the strip. But if you do this right now, you will get a rectangle with a dotted outline. Here's a simple trick: create a new empty layer above the dotted line layer and merge the two layers (select these layers in the Layers panel and do the Merge command).

After that, simply stretch the line wider with the command Edit (Editing)>Transform (Transform).

If you create a new layer above the layer with lines, fill this layer with a gradient fill and apply the menu command from the layers panel Create Clipping Mask to it, you will get this rainbow stripe.

And using the Edit > Transform > Warp command allows you to get interesting effects.

Method 2.
Parallel lines can be created using gradients. The disadvantage of this method is significant - you must first create a gradient using the gradient editor. If you don’t know anything about working with the gradient editor, go here:
The advantage of this method is that, firstly, you can create a striped gradient, save it and use it always, secondly, you can create multi-colored gradients, gradients with blurry or clear transitions from the line color to the background, you can create double, triple lines with at different intervals between them. Or download ready-made ones or
Creating a gradient to draw parallel lines is easy. Open the gradient editor and add color markers in the desired positions (just click the mouse in in the right places, color and distance are specified in the appropriate fields.). The Location field specifies the marker indentation in % from the left edge; the distance between markers is the distance between lines.

Small markers next to the color marker determine how blurry the line is. Try moving them closer to the line and see the result.

Handles above the gradient bar control the transparency of the gradient areas. White markers indicate transparent areas (Opacity is 0). This gradient is convenient for drawing on a ready-made background:

An example of using this gradient:

And don’t forget that there are different gradients - diamond-shaped, radial, mirror, which allows you to create different shapes with one easy movement:

3 way.
To start, draw one line on a new layer.

Go to the Actions palette, create new operation(Line, for example), click the record button and follow simple steps: copy the layer with the line and move it up or down to the desired distance. The job is done, click the Stop recording button. It should look something like this:

After that, press the triangular Play recording button as many times as you need lines.

As a result, the image has many layers with lines. If you are happy with the result, combine the layers with lines into one layer.
Duplicating the lines layer and then rotating the duplicate at right angles or any other angle makes it easy to create a mesh.
And applying styles - effects:


Lines, as well as other geometric elements, are an integral part of the work of a Photoshop master. Lines are used to create grids, contours, and segments. various shapes, skeletons of complex objects are built.
Today's article will be entirely devoted to how you can create lines in Photoshop.
As we know from the school geometry course, lines can be straight, broken and curved.
Straight
To create a straight line in Photoshop, there are several options using various tools. All the main construction methods are given in one of the existing lessons.
Therefore, we will not linger in this section, but will immediately move on to the next one.
Broken
A polyline consists of several straight segments, and can be closed, forming a polygon. Based on this, there are a couple of ways to build it.
- Unclosed polyline

As we said earlier, such a line is a polygon. There are two ways to construct polygons - using the appropriate tool from the group "Figure", or by creating a free-form selection followed by a stroke.
- Figure.
When using this method we get a geometric figure with equal angles and the parties.

To obtain a line (contour) directly, you need to adjust the stroke, called "Stroke". In our case, it will be a solid stroke of a given size and color.

After disabling the fill

we will get the required result.

Such a figure can be deformed and rotated using the same "Free Transformation".
- Straight-line lasso.

Using this tool you can build polygons of any configuration. After placing several points, a selected area is created.

This selection needs to be circled, for which there is a corresponding function that is called by pressing RMB on the canvas.

In the settings you can choose the color, size and position of the stroke.


Curve
Curves have the same parameters as broken lines, that is, they can be closed or open. You can draw a curved line in several ways: with tools "Feather" And "Lasso" using shapes or selections.
- Unclosed
- Closed
Such a line can only be drawn "Per"(with a contour outline), or “by hand”. In the first case, the lesson, the link to which is above, will help us, and in the second, only a steady hand.
- Lasso.

This tool allows you to draw closed curves of any shape (segments). Lasso creates a selection, which, to obtain a line, must be outlined in a known way.

- Oval area.

IN in this case the result of our actions will be a circle of regular or elliptical shape.

To deform it, it is enough to call "Free Transform" (CTRL+T) and, after pressing RMB, select the appropriate additional function.

On the grid that appears, we will see markers, by pulling which you can achieve the desired result.

It is worth noting that in this case the effect also extends to the line thickness.

- Figure.
Let's use the tool "Ellipse" and, using the settings described above (as for a polygon), create a circle.

After deformation we get the following result:

As you can see, the line thickness remained unchanged.
This concludes the lesson on creating lines in Photoshop. We learned how to create straight, broken and curved lines different ways using various program tools.
These skills should not be neglected, since they are the ones that help build geometric figures, contours, various meshes and frames in Photoshop.
Good day everyone, my Dear friends and guests of my blog. Today I would like to tell you how to draw a straight line in Photoshop or its online versions. Of course, the segment looks much neater than something drawn with a trembling hand. Oh, this trembling hand)). Well, okay, let's not pull the cat by the rubber band. Go!
First, let's look at the simplest methods drawing.
Draw lines horizontally and vertically
The easiest way to draw straight line- take any drawing tool (pencil or brush), hold down the key SHIFT and lead in the direction you need (up down or left and right). Rest assured while you hold shift, there will be no trembling hand, everything will be recorded.
Drawing lines at an angle
If you want to draw a line at an angle, select the brush (pencil) tool in the toolbar in the same way, and then put a dot in the place where you want the beginning to be.
Now, hold down the key SHIFT and click in the place where the end should be. After this, the line will be instantly drawn automatically from the start to the end point.
In addition, you can make a real broken line. To do this, you just need to poke in the places where it should break. Just remember to do this with the Shift key held down.
Drawing straight lines using guides
Just yesterday I published an article about that, and today this topic will also be very useful to us. To do this, pull out the guides from the ruler area with the mouse button held down and place them in the places where you need them, and then take the pencil again and draw along it. Thanks to its binding property, it will magnetize your drawing to itself.

Only, unlike the previous method, you will not be able to move far away, since the guide actually acts like a magnet. As long as you draw close, the drawing is attracted, and as soon as you move away, your trembling hand comes into play again.
Figures
And of course, we must not forget about the main tool, namely the figure of the same name. In order to draw a straight line in Photoshop this way, you need to go to the “Shapes” tool and select the “Line” tool there.

Before you start drawing, go to the tool settings above and see what you can customize here:

Now just left-click anywhere on the sheet, after which you will see the beginning. It will be as if nailed down, and at this time you will be able to decide where the end will be. You will end up with what we expected. It is noteworthy that with this tool you can draw lines at an angle, and not just vertically or horizontally.
Drawing lines with the Pen tool
Previously, we used as one of the selection tools. But of course, this is not all of his abilities, and now we will draw a straight line using him.

Now everything is displayed as it should, and you can make not only straight lines, but also broken ones. So this once again proves that Photoshop is just a versatile program and the same tool can perform different functions for different jobs.

Rectangular Marquee Tool
A rather unusual way to draw a straight line, but nevertheless, some Photoshop users really like to use it.

As a result, we got a black stripe that you can turn into a line. To do this, just go to the transformation mode ( CTRL+T) and simply increase or decrease the length and width by left-clicking on the edges.

Well, if you want it to be at an angle, then use the same transformation to turn it over. To do this, place the mouse cursor next to the corners of the selection until the cursor changes to a curved arrow.

How to draw a line in Photoshop online
I know that not everyone is ready to install a cumbersome program on their computer, so we will try to make do with a special service. In fact, it’s not difficult to draw a straight or broken line in Photoshop online, simply because this version is highly neutered, there are very few ways there.
The first method is that you will need to select the Brush or Pencil tool and poke anywhere on the canvas to create a starting point. Now hold down the key SHIFT and poke the one where you would like to see end point. After this you have a straight line. This method is similar to what we did in the program.
The second method is that we select the Draw tool, assign any color (or leave the default one), hold down the left mouse button and start drawing a black rectangle. You yourself can control how thick or long it will be.

But it is important to remember that Photoshop online does not have a Transform tool, so the segment you draw cannot be changed, enlarged, reduced or rotated at an angle.
Well, that's basically all I wanted to say. I hope you now understand how to draw a straight line in Photoshop in different ways and without any effort.
Well, if you don’t know Photoshop or don’t know it well, then I recommend that you watch these wonderful video tutorials, where they will tell you and show you from A to Z how to work in Photoshop. All lessons are told in simple human language and with great interest. If you don't mess around, you can learn Photoshop in just a couple of weeks. Highly recommend.
Well, this is where I end my lesson, I hope that you liked my article today. Don't forget to subscribe to my blog and share the article materials on in social networks. I'm waiting for you again. Good luck to you. Bye bye!
Best regards, Dmitry Kostin.
In this tutorial I will show you how to create beautiful abstract lines, which will be useful in the design of your work. This tutorial is perfect for beginners.
This is what the final result looks like:
Step 1. We create new document size 800x800 px, fill the background with black. Create a new layer above the background one, press the P key to activate Pen Tool(Feather). Create a line as in the screenshot below:

If you can't draw the curve, that's okay. To do this you need to press ALT key and drag the end of the curve to edit its shape:

Press B to activate Brush Tool(Brush), select a 1 px brush:

In the window Color Picker(Color selection) select the required color:

Activate again Pen Tool(Pen) (P), then right-click on the created curve and select Stroke Path(Outline Stroke):

Choose Brush(Brush) from the drop-down menu, make sure that the option Simulate Pressure(Simulate pressure) is active, and click OK:

And we get this beautiful curve:

Step 2. Using the process described above, we create three more lines. Make sure that:
- each line is on a separate layer;
- for the first line, the brush size is 2 px, the second - 3 px, the third - 4 px;
- reduce the opacity of the layers to 80%, 60% and 40%.


We adjust the location of the lines and get the following result (4 lines on 4 layers):

Step 3. Create a group "Lines" Layer - New - Group(Layer - New - Group) and move all 4 layers with lines into it. Duplicate the group once and merge the copy of the group into one layer (CTRL+E). Reduce the opacity of the new layer to 70% and move the lines lower and to the left to create the effect of depth:

Continue duplicating the layer to create more lines:

Now we need to add some color to the lines. To do this, use an adjustment layer Layer - New Adjustment Layer - Hue/Saturation(Layer - New Adjustment Layer - Hue/Saturation) for layers with lines (don't forget to create a clipping mask for the adjustment layer CTRL+ALT+G).

Choose any color you like:

We continue to add more colors. You can use Free Transform(Free Transform) (CTRL+T) to adjust the angle of the lines:

We also adjust the size of the lines:

Step 4. Now let's add some gray lines. To do this we go Image - Adjustments - Desaturate(Image - Adjustments - Desaturate) or SHIFT+CTRL+U to desaturate one of the layers:

Mixing the gray lines together with the rest:

And we get the following result:

Step 5. Almost finished. Now we merge the layers with the lines that we created into one (CTRL + E), then duplicate them, rotate them, change their position:

Let's add abstract dots around the lines to diversify the work. To do this, set up a brush as shown below (press F5 to bring up the brush parameters window).
IN Adobe Photoshop There are a huge number of built-in functions that can be used to create various objects, retouch photos and more. A novice user who has just begun to comprehend the basics of this program would do well to consider the problem of how to draw a straight line in Photoshop. And those who have been in this environment for a long time may be interested in remembering the basic ways of drawing a straight line. One method or another will be useful in individual cases.
How to draw a straight line in Photoshop?
There are many ways and techniques for drawing various lines and elements. But before you draw a straight line in Photoshop, you need to keep in mind that there are three main and quick ways line images: Brush, Pen, and Line tools. Despite their simplicity, it can be assumed that everyone has their own drawing technique and each user chooses the tool himself, guided by his preferences and the task that faces him.
Brush tool
The simplest and most understandable method is drawing using the Pencil and Brush tools in Photoshop. It is worth keeping in mind that these tools draw, and do not create some kind of object, so the image of the lines will be on the selected layer itself. You can avoid this situation and draw the line on a separately created layer. In this case, you can edit the brush mark without restrictions without harming other layers.

To draw a line, just select the Brush or Pencil tool. Then click on the left mouse button and use the cursor to set the direction of the line. In addition, you can use the right mouse button to open an auxiliary window with settings, where you can select the type of brush, determine the hardness and shape of the tip.
A straight line can be drawn using the tool in question using the method of multiple magnifications of the image. The closer the image is, the greater the chances of drawing a more or less straight line manually. A perfectly straight line can be created by holding down the Shift key and using the same Brush/Pencil tool. By activating the right tool, hold down the left mouse button and the Shift key - we observe the construction of a straight line, controlled by the cursor.
Line tool
There is another way to draw a straight line using the Line Tool in Photoshop. In the panel quick access a block is included that combines a number of geometric tools, including the one under consideration. The created lines will be distributed into new layers, which will be formed automatically after constructing a straight line.
Before drawing a straight line in Photoshop, you need to select the tool of the same name and click on the left mouse button at the point where the beginning of this element will be. To complete the construction, you need to click on the LMB again.

The convenience of this method is that lines can be combined into a common layer and provide full editing of a group of constructed elements. The merged layer, after finishing work on it, can be rasterized, but it will no longer be possible to work with the merged elements in vector graphics format. You can format a rasterized layer in the same way as others. Another advantage is the fact that you can edit the lines themselves without losing quality. The vector line editing menu is located at the top of the program - its header. Here you can set the line color, its outline, shape and thickness.
Pen tool
A universal tool for creating shapes of varying complexity. With this function and the multiple magnification method, you can select new figure hard-to-reach areas in the image. So, for example, you can draw both straight lines in Photoshop and curves. Mastering this tool is extremely important - it is used everywhere in many creative works, when it is necessary to cut out an image or create a new graphic interpretation.
How the Brush and Pen Tools Work Together
Using a pen, you can easily draw a straight line in Photoshop. To do this, you must first select the "Brush" tool, where using the right mouse button, a dialog box opens and the desired hardness, size and color of the future line are entered. Now you should activate the Pen tool in the quick access panel (in addition to the regular pen, there are other types of the Pen tool in the block, but we won’t need them). Place the first anchor point in the place where the beginning of the line should be. Then we put another point - the end of the line.

The Pen tool does not create a work object, but only a path. In order for the user to turn the path into a real object, he needs to stroke the path. The Paths panel is located by default in the lower right corner, where layers are usually located. In this window, select the "Contour" tab, where you can see our work contour. Right-click on the outline and select "Stroke Outline". In the Photoshop window that appears, the brush is in the box by default - you don’t need to change anything, just confirm the action.


