How to remove gel or acrylic nails at home
When it comes time to remove the nails after their extension, the question invariably arises: how to remove the extended nails without damaging the “native” ones? Of course, it is best to do this in the salon with a master with extensive experience. But what to do if there is absolutely no time to visit the salon or such a procedure is not yet affordable, but you need to remove your nails urgently? Our tips will help you remove extended nails at home correctly, preserving the beauty and health of natural nails. If you believe the professionals, natural nails deteriorate not so much from the extension itself, but from the incorrect and rough removal of the extended nails, therefore, such procedures should be carried out independently with extreme caution.
We agree right away that you must have enough time left, special tools and all the necessary materials, as well as know exactly what your nails are made of - acrylic or gel. This is important, and you will now understand why.
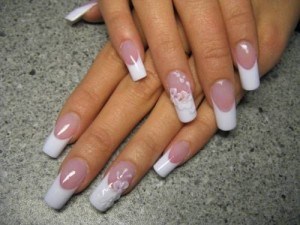
artificial nail removal procedure
back to contentsHow to remove extended nails at home
We take ordinary tweezers from a standard manicure set. The free edge of the nails must be carefully bitten off, making sure that you do not remove your own along with the artificial edge. Be careful - artificial nails have very sharp edges, do not get hurt! Having freed all the nails from the free extended edges, you can proceed to the removal on the plate itself. This is where the differences begin due to the material of artificial nails.
back to contentsHow to remove acrylic nails
We will need:

- special liquid AcrilikRemover, if there is none - ordinary nail polish remover. Just choose a liquid that contains acetone, yes, don't be surprised, the other is no good. Try to minimize harm to your hands and buy a quality product from a specialty store. Acetone, of course, will not bring benefits to the nails, but still this method is more gentle than the rough “peeling off” of acrylic;
- nail file with a large abrasive;
- aluminum foil - ten plates of approximately 12x7 mm, you can use foil from a chocolate bar, which is good to eat before the procedure for good spirits;
- pieces of cloth large enough to completely cover the nails, cotton pads are also suitable.
Be sure to put on safety glasses (remember the sharp edges of artificial nails?), Bouncing off pieces of acrylic can hurt your eyes.
- In no case do not even try to tear off the acrylic nail from your nail, because the master used special glue during the build-up so that the adhesion of the natural nail and the artificial one is strong. Don't hurt your nail, be careful!
- Armed with a nail file, we cut off the top layer of the finishing gel. It is difficult to do this, it is very hard, so you will have to be patient, because without this further removal of the extended nail is impossible.
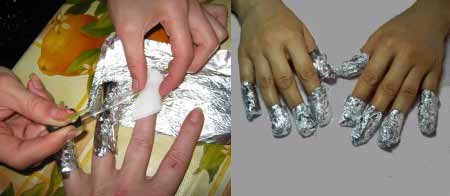
- After the finishing gel is cut down, we moisten the cotton pads in the liquid, apply it to the acrylic nails, and so that the liquid does not evaporate, cover the disks with pieces of foil on top. Try to press the foil tighter around the edges so that air does not get inside.
- Having covered all the nails with cotton pads and foil, we note the time - in order for the acrylic to completely soften, it takes 35-40 minutes. After that, the acrylic will become like jelly and can be easily removed with any sharp tool without damaging your own nail. Removal should be done quickly as the acrylic may harden again. The remains of acrylic on the nails are removed with a cotton swab dipped in liquid.
- At the end of the procedure, wash your hands thoroughly with soap and treat them with a softening cream.
- In almost the same way, you can remove nails from biogel, only you need to use special liquids, which are available in a wide variety in specialized stores.
How to remove gel nails
It is very difficult to remove gel nails. No liquid will help here, the gel does not soften, does not dissolve, you can remove them only by cutting them off.
If you remove the nails in the salon, then the master spends about 5-10 minutes cutting one nail, if there is a special machine, even faster. True, when using such a machine, the nail gets very hot and you need to take frequent breaks. After the nails are processed, the master removes the remains of the gel with a file.
But this is the master. After all, he has both hands free, he can alternate them and work quickly, but we will have to manage with one hand. If you do not use special tools, you can spend a whole day on the procedure for removing nails! Therefore, be sure to purchase:
- wide file with an abrasive coefficient of 80/100;
- file with a ratio of 150/180;
- brush for removing gel dust;
- buff file for polishing.
Gel nails removal steps: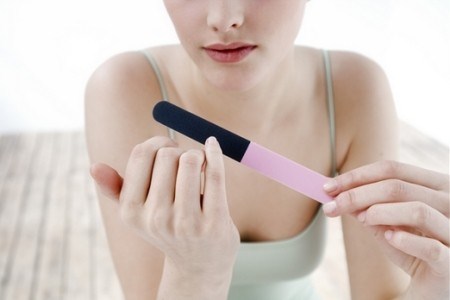
- The free edge of the nail must be bitten off with tweezers in the same way as described above (do not forget about sharp edges and eye protection!);
- During sawing, a lot of dust will arise, periodically we take breaks to remove it with a brush, and also to check how the work is progressing;
- During sawing, extreme care should be taken not to damage your nail, especially when the process is nearing its end;
- If we try to run a cotton swab dipped in acetone over the nail, we can see the border that runs between the gel and the natural nail. You can also just press lightly on the nail and feel that the gel is much harder than the nail;
- Having removed almost all the gel, we change the nail file to the second one, with a higher degree of abrasiveness, that is, not so granular. Continuing to file off the gel, the pressure on the nail is slightly reduced. At the same time, you can notice how the gel begins to peel off with scales near the nail itself, but you should not completely remove it. A thin layer of gel will not interfere at all, and will only strengthen the nails;
- We polish the nail with a polishing file;
- The dust that was formed during the process of cutting the gel can greatly dry the skin around the nails, therefore, after completing the work, we must treat the nails with a nourishing cream.
If your nails were built up using a combined method using both gel and acrylic, you will have to go to the salon, since there is a very high probability of damaging your nails by poor-quality removal of the extended layer.
back to contentsNail care after extension removal
 No matter how carefully and delicately you carry out the procedure for removing extended nails, for natural nails it will still be a difficult test and a real stress, after which they will need to be restored, strengthened and protected. Special manicure oils or any vegetable oil, for example, olive, apricot or ordinary sunflower oil, which is always available on the farm, will come to the rescue.
For an anti-stress restorative massage, a small amount of the selected oil is slightly heated, lubricated with it on the nail plate and massaged with smooth movements with light pressure.
In a salon, after an oil massage, the nail plate is usually polished with a special suede polisher. If at home this was not at hand, you can use a piece of dense suede. This will not only give the nails a well-groomed look and a healthy shine, but also protect them from delamination.
We hope our tips have helped you and now you can remove extended nails yourself at home, with minimal risk of damaging your own. Good luck to you!
children's dentistry


