Arrows on the eyes: application technique
For some, they simply do not suit, others do not dare to complement their image with a bold black line, and still others want to, but cannot do it right.
And just how it is right to apply arrows to the eyes, we will now figure it out.
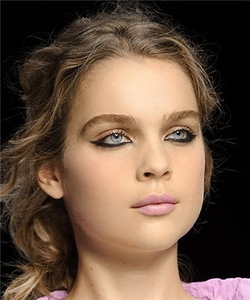
Professional stylists are taught how to draw arrows on the eyes correctly. It is believed that a good makeup artist must be able to work with arrows and apply red lipstick perfectly - makeup in the style of the 50s is considered the pinnacle of professional skill. By the way, this image is now considered the most fashionable. There are some differences from the classic retro makeup: this season, the arrows do not rise sharply, but continue the eyelid line and gently rise at the very end. Such makeup makes the eye "cat", and the look - incredibly flirtatious. However, not only a professional, but also any girl can learn how to draw arrows, you just need a little patience, perseverance and good cosmetics.
In order to achieve the desired effect, you need not only, correctly, but also to know HOW to draw arrows in front of your eyes. The most difficult thing is to draw arrows in front of the eyes with liquid eyeliner, this option is more suitable for experienced users. For those who do not feel so confident in this area or are going to draw arrows for the first time, it is better to use a pencil, shadows or a liner.
Secrets of the "correct" arrows
- The outline of the arrow must always be drawn in bright light and in front of a mirror. You need to see all your movements
- Very often, the arrows of many of the fair sex are uneven due to the fact that they draw them on weight. In order for the arrows to be smooth and beautiful, make sure that the process of applying makeup does not cause you discomfort; take a comfortable posture. Place a mirror directly in front of you, and do not hold it in your hand, be sure to draw rest your elbow on the table
- Recommended for eye makeup slightly pull the skin of the eyelids to the side and up when drawing arrows on the eyes - so the line is smoother. Tilt your head back a little.
- Keep the eye on which you draw the “arrow” half open- so you will immediately see possible irregularities.
- Start with drawing a thin "arrow"- you can always make it wider later, but it will be much more difficult to remove possible irregularities if you draw a bold line. It is best to start drawing thin arrows first, and then thicken them as needed!
- If you are using a pencil to draw an arrow, then the pencil lead should be perpendicular to the eyelid and be well sharpened.
- Powder the eyelid a little (this is done so that the pencil lasts longer)
- Try to lead the line as close as possible to the lash line. Then contour breaks will not be visible and then you will get the visual impression of the most dense eyelashes, and you can also avoid an unaesthetic white strip between the arrow and the edge of the eye.
- Arrows on both eyes should be the same length and width. Even the slightest deviation is unacceptable, since with different arrows the eyes will look asymmetrical, even if in fact the woman does not have such a defect. Bringing both eyes, compare the symmetry of the arrows and, if necessary, correct the lines with a cotton swab dipped in makeup remover.
- The tip of the arrow must always point upwards, otherwise, the effect of sadly lowered eyes is obtained. To do this, choose a direction, focusing on the line of the lower eyelashes: the tip of the arrow should, as it were, extend it, rising to the top. Always bring the arrow beyond the edge of the eyelid - otherwise visually reduce the eyes.
- After drawing the entire outline, draw a few more lines outside of the eye. On the inside, the contour should remain thin, barely noticeable.
- If eye makeup includes not only arrows, but also shadows, then arrows draw over the shadows. To make the arrow pointed with a pencil more resistant, it must be fix shadows the same shade.
- Correct any errors in cotton swab with tonic or mild make-up remover oil-free (on an eyelid that has absorbed oil, it is difficult to re-apply persistent makeup). If the line turned out to be very uneven, apply dark shadows over the “arrow” line and blend them towards the outer edge of the eye.
- Be sure to apply some generous ink layers or use false eyelashes - bright arrows require a harmonious addition in the form of no less bright eyelashes.
- Arrows, especially black or bright colored ones, are always an accent in eye makeup, so the area around the eyes should look flawless. Makeup base will help to even out the skin tone of the face - a primer, a concealer will mask circles under the eyes, and body shadows or transparent powder will even out the surface of the eyelids to make the arrows more clear and persistent
Types of arrows for the eyes
Arrow through the entire upper eyelid. This type of arrow is very good for rounded eyes. To visually stretch the eye, you can vary the thickness of the arrow and direct it upward towards the temple.
Arrows through the upper and lower eyelids. You can draw an arrow not only through the entire upper, but also through the lower eyelid. Such arrows can either connect at the inner and outer corners of the eye, or remain separate. Their thickness can also vary depending on the situation. This type of arrows will look great as an evening, masquerade or festive make-up option.
 Arrow on the lower eyelid. Such an arrow can complement the already existing eye makeup created by shadows and allows you to complete this look. It may not necessarily be black, it can, for example, emphasize the color of your eyes or contact lenses, and apply shadows of any other color on the upper eyelid.
Arrow from the middle of the century. Using the arrow from the middle of the eyelid, you can slightly enlarge the eyes. This arrow is perfect for daytime makeup. To make it look as natural as possible, its base should be as subtle as possible, avoid sharp edges, otherwise the arrow will look
Arrow following the contours of the eyes. Such an arrow makes the eyes clearer, it can be used to create smoky makeup. Unlike other types of arrows, this arrow closes at the outer corner of the eye, not rushing up towards the temples.
There are still a huge number of variations of arrows, exactly as much as your imagination and creativity will last. Try, experiment, draw different versions of the arrows in front of your eyes, and then you will find exactly the one that will suit you the most.
There are several possible ways to draw an arrow:
Starting from the inner corner of the eye. Begin to draw a contour from the inside of the eyelid. Gently draw a line to the outer side of the eye along the cilia growth line. ;
Starting from the middle of the eye: first from the middle of the eyelid to the outer edge, then connect the inner corner to the middle. This technique not only facilitates the creation of a smooth arrow, but also visually enlarges the eye, increases the visual density of the eyelashes.
Most women believe that the arrow should be drawn with one solid line. But in this case, it is almost impossible to draw a straight line. It is best to draw the arrow in two passes - from the inner corner of the eye to the middle of the eyelid and from the middle of the eyelid to the outer corner of the eye.
Pre-eyeliner, several points are placed along the entire contour of the upper eyelid, which are then connected into one line.
Arrow drawing technique
The technique of drawing arrows at first glance is very simple, although it differs somewhat depending on the medium you have chosen.
We draw arrows on the eyes with eyeliner
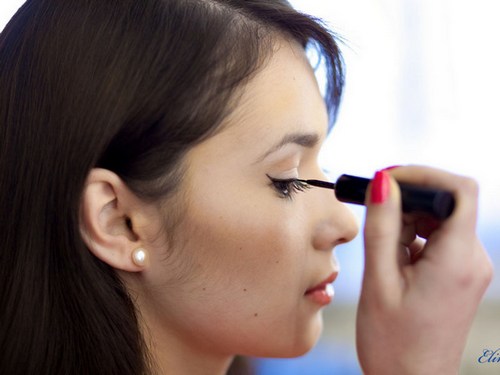
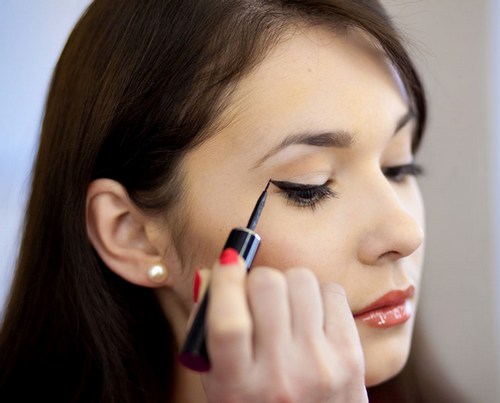
Liquid eyeliner allows you to draw beautiful smooth arrows, however, in order for the line to turn out to be clear and at the same time not greasy, lubricate an excess amount of eyeliner from the brush on the edge of the tube. Next, attach the brush as close as possible to the base of the cilia and smoothly but surely draw the desired outline. If suddenly in the process your hand trembled, and the line went a little differently than you planned, you can always correct it by removing the excess with a cotton swab or cotton swab.
Liquid eyeliner can, in the process of drying, slightly tighten the skin of the eyelid;
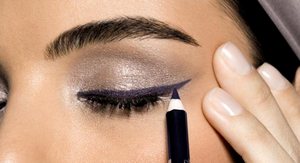
Having learned to draw arrows with liquid eyeliner, you can move on to a more versatile tool - a pencil. Before you start drawing, be sure to sharpen the pencil, then the line will be thin and elegant. For ease of application, you can slightly lift the eyelid with the index finger of one hand so that the pencil can freely draw an arrow as close to the lash line as possible. To do this, place your index finger approximately at the bend of the eyebrow and pull the eyelid up a little, and with the other hand begin to carefully draw the arrow.
- Draw arrows on the eyes with shadows
The use of shadows opens up new possibilities for you, and also gives you an extraordinary scope for imagination when drawing arrows. For application, you will need a thin brush with a beveled end. The brush must first be moistened and put on it a certain amount of shadows. In order for the shadows not to crumble during application, it is better to take a small amount of them on the brush. And after you finish drawing the arrows on the eyes, you can brush off the crumbled particles with a wide brush and powder the area around the eyes a little.
Shadows can also be used to create a smoky eye effect. To do this, first draw the arrows with a pencil, and then shade them a little with the shadows of the desired color.
- Now let's try to draw arrows together
1. Apply foundation first.
2. Then apply neutral shadows to the entire surface of the eyelid (pearl, cream, light gray or light brown) - carefully blend the shadows to the brow bone (base for shadows of a more expressive shade).
3. To outline the contours of the eye, apply a more saturated shade to the eyelid and crease. It is necessary to shade the shadows towards the outer corner of the eyebrow, as this will serve as a guide for drawing the line of the arrow.
4. Now apply shimmery shadows of a delicate shade under the eyebrows to emphasize the line of the eyebrows.
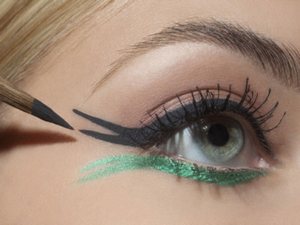
5. The most important element of makeup with arrows is the spectacular contour of the arrow itself. Now, with a special eyeliner, draw a line as close as possible to the lash line, starting from the corner of the eye, where the eyelashes are very rare, to the very outer corner. You should get a straight line. Having reached the outer corner of the eye, carefully draw a line outward and upward, focusing approximately on the middle of the temple and making the line thinner and thinner. The arrow should end with a sharp end.
Then, from ½ of the eye, begin to thicken the arrow, drawing its upper contour. It turned out a smooth arrow.
6. Now carefully draw a line along the lower eyelid with the shadows with which you made the indicative contour, starting from the outer edge of the pupil. Connect this line with the contour drawn by the eyeliner and blend a little.
7. Apply 2-3 coats of mascara to upper lashes only.
8. Now outline the eyebrows, apply some blush, create a clear lip contour (lipstick or gloss). Arrows ready!
A few tips on how to draw arrows correctly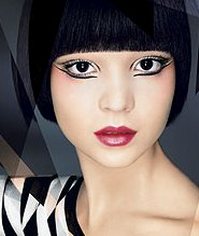
- When drawing arrows on the eyes, it should be remembered that the line should gradually thicken in the direction from the inner corner of the eye to the outer. The thickness of the line on the upper eyelid should be greater than the thickness of the line on the lower.
- Arrows on the eyes are recommended to apply after applying eyeshadow, some types of arrows can be drawn without shadows at all.
- thick arrow good when there are almost no shadows. Draw it just above the eyelash contour, and then paint over the middle. It is most convenient for this eyeliner in the form of a felt-tip pen.
- thin arrow makes eyelashes fuller and thicker. Run it right over your lashes, just a little beyond the corner of your eye.
- To "stuff" the hand before drawing arrows on the eyes, it is recommended that you first practice on a sheet of paper, outlining the outline of the eyes drawn on paper. This is especially true for liquid eyeliner.
- If you haven't gotten your hands on arrows yet, start learning with a pencil or a definer. A brush is already for the pros, but for beginners I’ll tell you one tricky trick. You can first draw the arrows with a pencil, then draw a liquid eyeliner along the pencil line. In this case, the tool will lie flat.
- If you draw arrows liquid eyeliner,Apply dry powder to skin first.. So the eyeliner will not crack when it dries. Eyelashes are usually painted at the last moment, after applying the liner. The brush should be placed on its side, without pressing too hard against the eyelid.
One little secret: a simple technique opens the eyes when we bring the upper eyelid with one color (I'm talking about pencils first of all), and make the eyeliner a few shades lighter along the lower eyelid.
The main thing in the right arrows is practice. It’s not easy to draw arrows perfectly the first time, so don’t despair if something went wrong. To apply eyeliner, you need a firm hand, a brush that fits comfortably in the palm of your hand, and a large mirror in which you can see the result of work from all sides.
children's dentistry


