The theory of gel nail extensions on forms. How to extend nails with gel: video and basic information about extensions.
Well-groomed hands are an attribute of every self-respecting woman, but not everyone has perfect nails. Only a few got narrow, almond-shaped nails with a protruding hole, dense and smooth structure of the nail plate. Deviations from the ideal are much more common. Some suffer from short nail plates, others from uneven or brittle nails. You cannot hide these defects with ordinary varnish. Nail extensions will help solve the problem.
Nail design (“nail” from English - nail), was discovered by European travelers in Indochina. Local beauties glued colored bird feathers to their nails. In the Middle Ages, European women glued wild geranium petals to their fingertips; it looked no worse than modern extended nails, but their beauty, alas, was very short-lived.
Our usual nail extensions using polymers were invented in the 50s of the last century. The secret of demand is explained by the fact that, in appearance, they are almost no different from natural ones. The most popular and simplest is, great for beginners, below we will look at the whole process step by step.
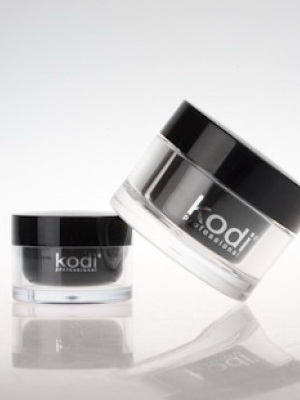
Gel formulations are based on natural and synthetic substances. A significant percentage of the nail gel is pine needle resin. Gel coating is thinner than acrylic and looks more natural.
The procedure takes less time, the composition can be corrected before curing under ultraviolet light, or removed altogether, so gel nail extensions are perfect for novice manicurists.
Step one. Choosing a design
Despite the fact that modern nail design is actively developing, offering more and more new options, more than 80% of women today choose the classics. Nail extensions with French gel can be considered classic; see the lesson for beginners below. The shape of the nail with this type of manicure is usually a soft square. But even the classic French manicure has variations; it can be done in brighter colors; the smile can be a contrasting color, even black. Another version of the classic is the American manicure, when the nails are painted in one bright but calm tone, preferably matching the color with, the length can be different, but it is advisable to choose a calm shape.
If we take avant-garde design, then the artist’s imagination can be almost limitless. Bouquets of flowers, fish and birds, metallic sparkles, piercings, manicures in several layers, sculptural acrylic modeling - you can afford almost any whim.
Asian fashion trends that have intensified in last years, suggest a combination of black and gray clothes, silver accessories and a very bright, even provocative manicure. Lemon, orange, bright green, electric blue and so on are often used. But with such bright colors of varnish, it is not recommended to weigh it down with additional design. Perhaps it can be complemented with a silver ring of nail piercing.
Wedding nail design can be either modest - for example, French, or multi-layered and sculptural. There are no special trends in wedding manicure, because the main thing here is personal taste and combination wedding dress, accessories, hairstyle and manicure into one harmonious and consistent image.
Do you agree that blood-red stilettos will look strange on the hands of a romantic shepherdess? But for a vamp femme fatale, it’s a completely different matter. Can't decide? Watch the video tutorial on gel nail extensions for beginners on our website!
Step two. Preparing the base
Use a buff to file the nail plate. Treat the end of the nail especially carefully so that there are no peeling marks and nothing gets in your way. Next, degrease the nail. A pharmaceutical solution of boric acid is suitable for this. After moistening the cotton pad, gently wipe the nail from all sides.
Step three. Applying the base
The main means of prolonging the life of the varnished nail wafer is the base coat, or, as it is often called, basecoat. It is similar to a colorless varnish and is designed to enhance the adhesion of the nail to the paint layer. In addition to the function of double-sided tape, the base performs other duties. One of them is protecting natural nails from aggressive components of coloring pigments.
Many who cover their nails without a base have noticed that after a while they acquire a yellowish tint. The reason for this is the substances included in the composition. Moreover, the quality of shellacs directly depends on these substances. If they are of natural origin, then their effect on nails is not aggressive.
Along with the protective function, base coatings solve cosmetic, therapeutic and strengthening problems. They are able to simultaneously smooth the surface of natural nails, protect them from contact with varnish and strengthen the connection with it. On the other hand, special bases containing appropriate ingredients not only strengthen thin and brittle nails due to the applied layer, but also change their structure.
Step four. Insert the mold and apply the gel
The paper form is applied to the natural nail. Take a brush and pick up some gel. Using rubbing movements, distribute it over the natural nail plate, not reaching the cuticle and side ridges 1 mm. The free edge of the nail is formed in larger droplets. Then the extended nail is sent to the lamp. After two minutes the form is removed. Ready!
Now you know how to apply gel nail extensions to forms for beginners, and if you approach the matter carefully and carefully, then the home result will be no worse than the salon one. Modern varnish coatings are those seven nails that make it possible not only to change their structure, but also to give them strength and flexibility. They simplify the procedure of applying nail polish and make the paint coating durable.
Four steps to gel nail extensions: instructions for beginners was last modified: May 4th, 2016 by MaximB
After studying the proposed material, you can understand how to extend nails with gel and even try to implement this method at home.
Gel (from the Latin “gelo” - solidifies) is a dispersed system with a liquid dispersion medium in which particles of the dispersion phase form a spatial structural network.
Gels have a number of advantages: they are odorless, they are simpler and easier to work with than acrylic, they have good adhesion and practically do not peel off.
What types of gels for nail extensions are there?
Types of nail gels may differ in their composite properties and have specific disadvantages. All types of nail extension gels used must have special hygiene certificates. Further in the material we talk about what types of nail gels there are and what from this arsenal you can use.
There are two types of gels:
- light-curing or UV gels;
- non-photosensitive.
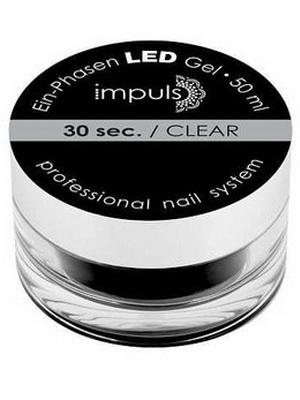
Light-curing gels (UV gels) harden when exposed to ultraviolet radiation, i.e. for hardening they require the presence special source light - ultraviolet or halogen. The fact is that under the influence of ultraviolet or halogen rays, urethane acrylate ester is released.

Light-curing gels adhere tightly to the surface of both the natural nail plate and artificial tips. When extending gel nails, no forms are used; the gel is applied in several stages, fixing each layer by drying it in a special apparatus with a UV or halogen lamp. While the nail with the gel is in the UV lamp, the gel molecules penetrate into the nail plate or tip, and the gel literally fuses with the nail. This strong adhesion ensures that the gel is firmly attached to the nail and does not allow it to peel off.
This is due to the fact that the gel contains an initiator substance, which is activated when exposed to ultraviolet light. The process of “cross-linking” begins inside the gel molecules, which in turn leads to complete hardening of the material. Occurring in the gel chemical reaction does not cause evaporation, and therefore the entire process is odorless, which is an additional advantage when working with gel.
At the same time, the gels different manufacturers contain different initiators. Each of them starts the process of “crosslinking” molecules only at a certain power of the UV lamp and a certain wavelength of radiation. In this regard, it is best to use a gel and a UV lamp produced by the same company.
If the UV lamp is not as powerful as it needs to be to set the gel properly, it will end up being rubbery and sticky. While excess ultraviolet radiation, on the contrary, can lead to excessive fragility of the gel and even darkening.
People suffering from an allergic reaction to sunlight, it is better to do a test on one finger.


Non-photosensitive gels harden under the influence of a special activating substance applied to their surface or upon contact with water.
The non-photosensitive gel is a dense, viscous cyanoacrylate monomer that resembles glue in appearance. It is applied with a brush, just like a light-curing gel, or squeezed onto the nail directly from the tube, spreading it over the entire surface of the tip or nail plate.
After applying and evenly distributing the gel over the surface of the nail, it should be treated with a catalyst. To do this, a small drop of this substance is evenly distributed over the nail with a brush. The catalyst is also produced in small bottles with a sprayer. As a result of the chemical reaction of these two substances, the gel hardens.
What gel do professional nail extension artists use?
There are gels that harden upon contact with water. In this case, the fingers with the gel applied to the nails are immersed in water for several minutes, where a chemical reaction also occurs, as a result of which the gel hardens. Next, let's look at what gel professional nail technicians use in beauty salons.
Often, to strengthen the nails and give them additional strength, silk or fiberglass is used, which is placed on the nails between the first and second layers of gel. When the gel hardens, a strong and elegant structure is obtained.
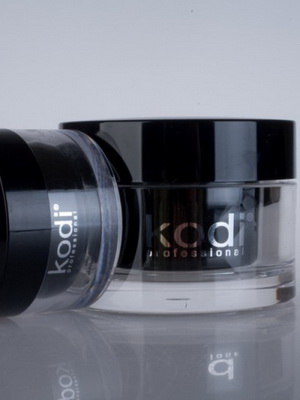
As a rule, gels used for nail extensions are transparent. After hardening, the artificial nail has a very smooth and shiny surface and is absolutely transparent, so these nails look very impressive even without decorative varnish.
However, there are also colored varieties of gels that do not require additional application of varnish in the future, but in this case you will have to wear your nails the same color all the time. It is much more convenient to have nails made of transparent or slightly pinkish gel, which allows you to cover them with varnish of any color, as well as create nails on their surface. beautiful drawings and patterns using special paints or colored nail polishes. The polish can be easily removed from gel nails using regular nail polish remover, but without acetone. Otherwise, you risk damaging the gel coating.
Stages of extension and sequential coating of nails with gel
There are several gel systems: single-phase, two-phase and three-phase. The stages of gel nail extensions must be carried out in compliance with a certain technology. The following describes the stages of covering nails with gel, which experienced manicurists consistently use in their work.
By phases we mean these stages of the nail extension process:
- First step - This is the application of a gel to adhere the modeling material to the surface of the nail. For the first phase, either special materials (primers or bondex) or the gel itself are used;
- second phase - directly designing the nail;
- third stage - final, during which the last layer of gel is applied to the nails, which gives them a glossy shine.
An analogy can be drawn: first, a base varnish is applied, then a decorative coating, and finally a fixative varnish. In this regard, there are several types of gel.

Single phase gel is something like a 3 in 1 shampoo. This gel is usually used by women with highly sensitive skin and fragile, brittle nails. It has three degrees of viscosity: medium, viscous and very viscous.

Biphasic gel (2 in 1) is a gel that contains both adhesion (cohesion) and construction in one type of gel, and a gloss fixer in another.

Three-phase gel- these are three different gels that perform three different functions. Its difference lies in the extension technology itself. Usually, when extending nails onto tips, one- and two-phase gels are used. In this case, the base layer ensures adhesion to the nail surface, and the second stage gives a glossy shine.
Below is a video of gel nail extensions that demonstrates the entire procedure from start to finish:
Three-phase gel extensions - convenient to model
When applying three-phase gel to forms, it is optimal to use this particular component, since it contains a denser constructing gel that spreads less, and therefore it is convenient for them to model the free edge of the nail. Also in this case, resin is used, since it is even thicker than gel and flows less. Thus, at the first stage, a base gel is applied, then a modeling layer, and finally a fixing gel that adds gloss.
Another advantage of the gel nail extension system is that gels, as a rule, do not cause an allergic reaction or irritation of the periungual fold. They perfectly smooth the surface of the nail, while at the same time providing a healing effect, which consists of using ultraviolet radiation for curing, since ultraviolet rays eliminate the very possibility of bacteria entering and the development of fungal diseases.
Disadvantages of gel nails and how to properly remove gel nails at home yourself
 However, in addition to its advantages, the gel nail extension system also has its disadvantages. The disadvantages of nail gel are that the plates are quite fragile and do not withstand sudden temperature changes. This can cause the gel on your nails to crack. If this happens, then it cannot be “repaired”; you will have to remove the entire nail and completely redo it. The key to long-lasting wear of gel nails is the professionalism of the manicurist who performed the manicure, as well as the quality of the materials used.
Besides that gel nails need to be adjusted regularly (every 3-4 weeks), they are quite difficult to completely remove from the nail. There is only one way to get rid of such nails - complete filing. This procedure is quite tedious, takes a lot of time and is not very useful for natural nails. Below we will discuss in detail how to properly remove gel nails according to all the rules.
Before you remove gel nails at home yourself, you need to familiarize yourself with the rules of this procedure. You can remove gel nails different ways. There are a number of non-photosensitive gels that dissolve in acetone. After soaking, the gel coating becomes soft and is moved using a metal pusher or wooden stick from the cuticle to the edge of the nail. Thus, all the gel is removed from the nail plate, after which the nail is carefully wiped with a thin polishing block. Then the cuticle and skin of the periungual fold are treated with a special oil or lotion and a manicure is performed. However, more often, files of various grain sizes are used to remove gel nails, cutting off the frozen gel layer by layer. This general rules How to remove gel nails without the help of a professional nail technician, but it’s better to go to a beauty salon.
January 10, 2014
Gel nail extension video
Video tutorials on gel nail extensions for beginners, will be able to help you master and easily master this technique. You will be able to perform step by step all the steps necessary for proper and accurate gel nail extensions. From these videos you will learn how to extend nails with gel, what tips and forms are, as well as various nail extension technologies. Learning how to do gel nail extensions using online video lessons will help you learn everything you need to do this as quickly as possible!
Hands are business card As a modern representative of the fairer sex, everyone dreams of having beautiful and well-groomed nails. Unfortunately, not everyone is blessed by nature with well-shaped nails, but continuously improving nail extension technologies make it possible to correct such shortcomings.
Gel nail extension It is considered simpler than acrylic, requiring some skill and professionalism. Gel can be used to extend nails using tips or special forms. Extensions using tips are more gentle.
Materials for gel nail extensions - video
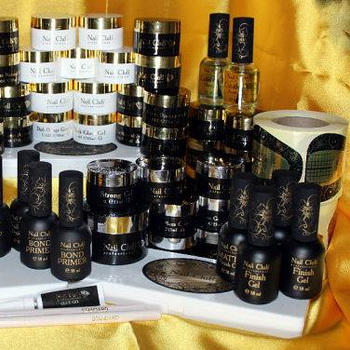
If you have decided to learn the art of gel nail modeling, regardless of whether you study in a good nail studio using their materials, or you are self-taught, it is very important to estimate the approximate costs of purchasing all necessary materials and tools. It is not recommended to opt for expensive advertised companies at the beginning of your studies; no famous brand of modeling materials will help the inexperience of a novice master. Stick to mid-priced drugs. So let's see what we need.
Gel nail extension video lesson for beginners
You should start with extensions by treating your nails. File your nails as carefully and as short as possible, trim the cuticle if necessary, and carefully sand the surface of the nail plate with a small nail file. After this, treat the nail with a degreasing agent.
Next, stick on the tips, choose them carefully, the width of each tip must match your own nail, otherwise they will quickly break. The tips are glued with special glue approximately in the middle of the natural nail, the other part of which, starting from the hole, remains free. The glue is applied to the tips in a special recess.
Leaving the required length of the tips, cut off the rest using special pliers. Using a large file, give the tips the desired shape. It can be rectangular, round or pointed (stiletto).
Using a brush, carefully apply a layer of transparent gel to the entire surface of the nail, including the tip. In this way, you can treat your entire hand at once, and then place your fingertips under an ultraviolet lamp, which will not only dry the gel, but also prevent fungus from developing on the nails. Special attention in this case, you should pay attention to the nail thumb- due to the fact that it is not located in a horizontal position in the lamp, the gel from it will most likely drain off before it has time to dry. Therefore, it is better to cover and dry this nail separately from others.
Gel extensions
Most hairdressers in beauty salons offer extension services. Unfortunately, not all of them are professionals and, perhaps, their work does not follow the technology and procedure for gel nail extensions on forms, which can cause significant harm to the plates. Almost every girl wants to have long and beautiful nails. But growing such beauty on their own is often hampered by the fragility and fragility of their own nails, which is why they resort to extensions.
This service is currently very popular, which explains the emergence of masters with a low level of training and self-taught. In this article we will discuss how to properly extend nails with gel.
What are gel extensions?
Learning how to do nail extensions is a profitable business, as lessons can be obtained online for free. And when you do it professionally, you can save significantly on the services of salon specialists. In addition, your skills will certainly be successful and popular with your friends, who will also want to get the perfect manicure without visiting a salon.

French extension
Before you start learning how to do gel nail extensions, it is important to understand what it actually is. There are two main categories. They differ in the technology of performing the procedure and some operational characteristics.
- Extension of French manicure on gel tips is shown step by step in the video. The main difference is that, in fact, an artificial nail is glued directly onto the bed, onto which the gel is then applied. The method is convenient because it can be applied even to very short natural nails. In addition, it can be made into much longer lengths or varied shapes. Removing a manicure on nail tips is quite difficult;
- The process, procedure and technique of gel nail extensions on forms are presented in the following video. In this case, small plates are glued to the stock. The gel is applied to them and the protruding part of its own bed. Such nails can be easily removed even on their own, but they hold well and do not break. The manicure looks more natural after this procedure.
Regardless of which gel nail extension technology is used in each specific case, the procedure for removing such beauty is very complicated. Especially compared to acrylic extensions. In fact, the gel is cut off from the bed with a rough file or a special machine. This can seriously damage the nail plate.
What are the types of gel?
There are also different types of gels for nail extensions. They are as follows:
- Three-phase (three-phase system);
- Two-phase (two-phase system);
- Single-phase (single-phase system).
Below is a video master class on gel nail extensions using a three-phase system. In this case, the three components are applied in layers. The first layer is necessary for good adhesion of your own plate and the artificial one. The second layer directly creates a new plate, and the third layer protects the new manicure and gives it strength.
And this is a clip in which gel nail extensions are presented step by step and are performed using a two-phase system. In this case, only two types of gel are used. One of them is necessary for adhesion to the plate, as well as for the formation of the nail body. The second is used to give it strength and smoothness, as well as shine.
Step-by-step nail extension with single-phase gel is described step-by-step instruction in photo and video lessons. In this case, one type of gel is involved in the entire creation of a manicure. It is entrusted with the functions of both adhesion and formation of the plate, and in addition, giving it strength.
Tip extension procedure

Extension on tips
Extending nails with tips can be presented in stages, and with a photo of such a manicure and a video showing the execution process, the training will be even more effective. This type of extension is relatively simple. It will work even for those who have undertaken this procedure for the first time. However, such a manicure lasts less time compared to extensions on forms. The process occurs in several stages. First we prepare:
- Disinfect all tools;
- Remove nail polish and polish them, push back the cuticles;
- Treat your hands with a disinfectant solution or wash them;
- Select tips according to size, nail width and length;
- Give them the desired shape.
After that, we proceed directly to how to do gel nails, that is, to what the video lessons show.
- Degrease and dry your nails;
- Apply glue to the natural plate in small quantities and distribute well;
- Press the tip onto your nail;
- Displace air bubbles from under the tips;
- Glue all the nails and wait a little;
- Apply the gel and dry under a UV lamp for 2 minutes. Common mistakes when applying gel nail extensions, this means under-drying or over-drying the layer;
- Apply another layer of gel and sculpt the new plate;
- Dry under a UV lamp;
- Remove the sticky layer and file your nails;
- Apply a finishing layer of gel;
This tutorial on how to do proper nail extensions with colored or transparent gel and a training video will be yours best helpers in performing the procedure. Thanks to them, the quality of the extensions that you do yourself will be comparable to those in the salon. Now you can move on to a more complex method.
Extension procedure on forms
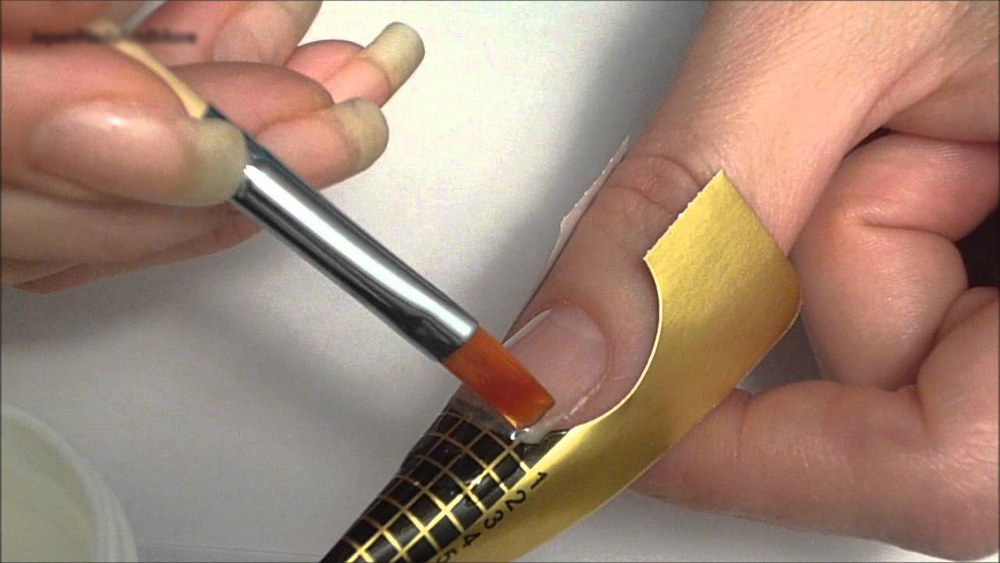
Extension on forms
Below you will find a video tutorial and instructions for gel nail extensions on forms. This method is more difficult to carry out the procedure at home. In addition, it can cause difficulties for less experienced craftsmen. The step-by-step process is as follows:
- Prepare your nails and tools as described above;
- Place the shapes under the free edge of the nail, securing them with the sticky part;
- Apply the first layer of gel and dry;
- Start shaping the plate according to the mold pattern. There is information on how to properly extend gel nails onto forms. different opinions, but we should agree on giving each an individual ideal form;
- Repeat the action on 10 fingers and dry;
- While the gel is still wet, the tip of the plate can be squeezed on the sides with tweezers and made narrower, etc.;
- After drying, file the ends and apply a layer of finishing gel;
- Dry under a UV lamp and the manicure is ready.
This is what the sequence, stages and theory of gel nail extensions on forms look like. The process is quite complicated. It won't be possible to complete it flawlessly on the first try. But once you get the hang of it, this extension will look very aesthetically pleasing. It is more durable and natural than extensions using tips. You can watch how nail extensions are done with runeil gel or another for free in this video, and learning how to do a manicure with a design will be much easier.
Not only extensions, but also strengthening of nails with gel are effective; you can see how to do it in the clip below. It is enough to prepare the plate, polish it properly and cover it with a base. After drying the base, apply the gel, sealing the tip and dry it under a UV lamp. After this, you need to apply a top coat and dry it. If necessary, remove the sticky layer.
In conclusion, we will post a video lesson on how to perform extensions short nails itself, which you can watch online for free. It is quite difficult to do extensions on your own. It’s better to at least practice on friends and acquaintances. So that the actions become automatic and you can easily perform them with your right hand.
We have covered a range of questions about how to do gel nail extensions; this information will help you conduct training online for free, which will also help with step-by-step instructions. After several attempts, you will be able to perform the most difficult extensions not only for yourself, but also for your friends. This will not only save on beauty salon services, but also recreate the most complex and creative design.
Well-groomed nails are one of the secrets female beauty. A high-quality manicure is a very labor-intensive process that requires a lot of time. For those who do not have such an opportunity, artificial nails are an excellent solution. Many people mistakenly believe that this procedure is quite simple and does not require professionalism. But this is absolutely not true, so it is highly recommended to study nail extension lessons for beginners.
First of all, you need to remember those conditions and diseases in which extensions are unacceptable: pregnancy, diabetes, intestinal dysfunction, nail fungus, taking antibiotics or drugs containing hormones.
Ideally, you need to take special courses and receive the appropriate certificates. But if this is not possible, then it is better to use training videos; fortunately, the Internet is replete with them. Beauty bloggers will reveal all the secrets of proper extensions and recommend fashionable designs.
Even a novice nail artist should understand the materials used in extensions.
Acrylic is highly durable because it consists of liquid and powder. It dries quite quickly, but it emits a specific smell. Acrylic nails can be various forms and sizes, combine sparkles and absolutely any colors. In addition, they last a long time and remain intact when impacted. It is possible that the colors will lose their saturation after some time, but the nails themselves will grow back someday and will still require correction.

Nails with gel extensions are also popular, and they also cause much less harm. The last point, of course, is reflected in the price, but gel nails completely justify it. They have a smooth surface and a pleasant shine, are close to the natural color and are very similar to natural nails.
This material is perfect for extensions at home. Drying it serves as an excellent prevention of fungus. These nails last for about a month, but can become cracked if handled carelessly. Gel extensions are difficult to combine with glitter or beads, but they are ideal for French manicures.
French visually lengthens and evens out the nail bed, is suitable for women of any age, easily combines with all styles of clothing and is relevant at events of various levels ( a business meeting, wedding, trip to night club etc.). We can distinguish the main types of such nail designs.
- French manicure on tips, that is, plastic blanks that are attached to a natural nail and covered with extension material. There are also tips with a finished colored edge, usually white.
- Painted or laid out nail edge using various colors, sparkles, rhinestones, stickers, etc.
- Extension onto forms (metal or plastic). They are fixed on the nail, filled with material, dried and removed, after which it is attached right size free edge.

The classic version of French manicure is beige or pink nail with a white edge, you can find many photos of such nails on the Internet. IN Lately many modifications appeared in both color and edge shape (zigzag, wave, beveled, V-shaped). For each type of manicure there are manuals in Russian that reveal all the details.
Nail extensions involve the use of special lamps that can polymerize various coatings. They speed up the hardening and drying process of the varnish, which is actively facilitated by the built-in fan. Many models of such equipment have a timer that regulates the drying time. These lamps are easy to use at home, and their cost will quickly pay for itself. In addition, home extensions are practically free for yourself, because there is no need to spend money on the work of a specialist. And if you have clients, income from nail extensions will become stable.
The main component of a successful manicure is the correct execution of the technique. In particular, this applies to removing the top layer of the nail with a grinder or a special file, which helps to better fix the artificial material. There is a wide overview of pictures and diagrams that explain how to perform this or that extension step by step.

Extended nails require specific care. Thus, the growing part becomes very noticeable, so it requires correction every 2-3 weeks. To do this, use a modeling agent made of the same material as the nail. It is very important to pay attention to the center of gravity, which may be displaced during regrowth, and it must be returned to its proper place. You can download the corresponding instructions for nail correction.
Compliance with hygiene standards has a significant impact on the prosperity of a home nail studio. It is better to remove cuticles a few days before extensions, which are not performed on damaged nails and the skin around them. You need to remove artificial nails very carefully, following the entire procedure. You can learn more about this by watching online videos and materials on various sites.
Video on the topic of the article


