How to use shellac at home. How to apply shellac - the preparatory stage. Why choose shellac.
Gel polish came into fashion 7 years ago, after the presentation of a fundamentally new type of coating American company CND, dubbed Shellac. The popularity of shellac is due to its durability, which is significantly superior to ordinary varnish, the saturation of shades, the variety of palettes and designs.
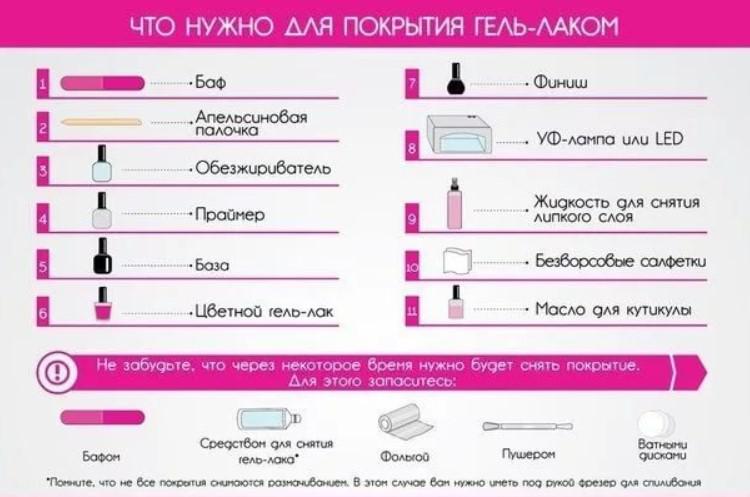
Manicure requires some preparation of nails, but can be done at home. What is needed for this?
List of materials for beginners
When self-covering nails with shellac at home, you need to buy all the tools and special equipment necessary for the procedure. It is undesirable to save on materials, since both the safety of the “native” nail plates and the durability of the manicure made depend on their quality.
The list of purchases necessary for such a manicure includes:
- base;
- fixative;
- colored gel polish;
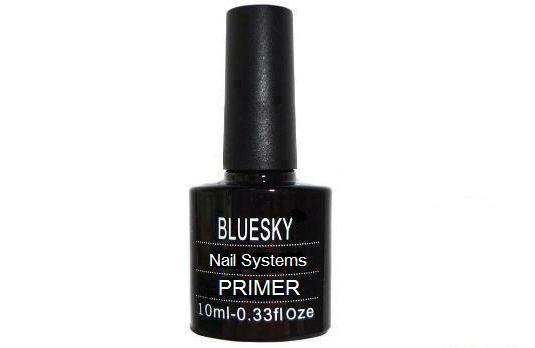
- primer (degreaser);
- cuticle softener oil
- means for removing the cuticle and sticky residue on the coating;
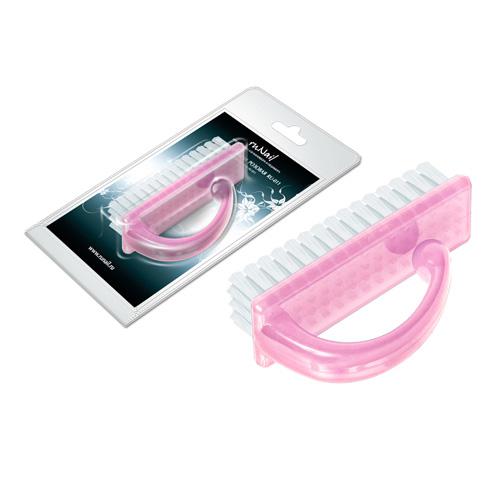
- nail files of varying degrees of abrasiveness, buff, tweezers;
- drying lamp.
Shellac is similar to a classic manicure, but requires mandatory polymerization in a special lamp.
Find out what are the benefits of Loreal Highlighter Powder. Delicate texture, natural radiance - .
Step-by-step instruction
Is a primer needed and why?
The primer is the secret to the longevity of a manicure. It is a colorless and odorless watery or gel mass with an acidic or acid-free formula. Acid-free formulations do not have an aggressive effect on the nails and are acceptable for use on thin, brittle plates, but are not particularly effective.

A primer based on methacrylic acid provides a reliable “adhesion” to shellac, while the product is approved for use only on healthy nails. The product is toxic, if it gets on the skin areas adjacent to the plate, it can provoke the formation of painful blisters, severe burning, redness, therefore it requires very careful use. It does not penetrate into the deep layers of the nail, absolutely does not harm their structure when used.
The product performs several important functions:
- Degreases and dries the surface of the nail.
- Disinfects, preventing the penetration of a fungal infection and its development.
- Prevents plate deformation, delamination, formation of microcracks, etc.
- Fixes the cover.
An acid primer does not work well with colorless shellac due to the white coating that remains after the product dries.

Result of correct execution

Basic set
What you need for eyelash extensions will tell you.
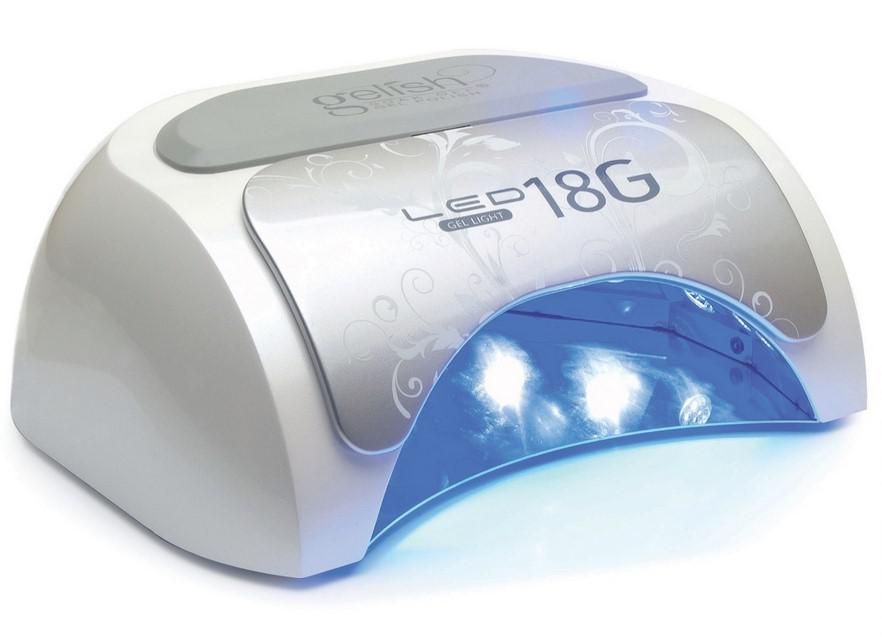
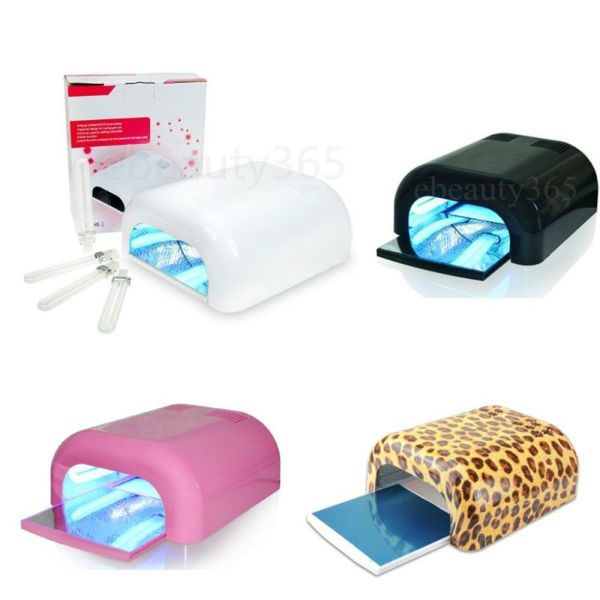
What lamp is needed to cover nails with gel polish
Polymerization (drying process) – required condition for this type of manicure. Today, 3 types of lamps are suitable for it (only 2 are used in a non-professional setting):
- ultraviolet (UV);
- LED (LED);
- Cold cathode gaslight (CCFL).
Each model has its own advantages and disadvantages.
Beginners often wonder what varnishes are needed for shellac. Let's start with the fact that the name "shellac" itself is a household name, initially this was the name of the innovative development of CND.
Only later, with the production of a similar product from other manufacturers, the name "took root" as a definition for all gel polishes. They are also needed for such a coating, regardless of whether the manicure is carried out independently or by the hands of a master.
Polymerization in an ultraviolet lamp
UV lamps are characterized by relatively low cost and a wide range of models, the most important parameter of which is their power (from 9 to 54 W).
Even a low-power UV lamp is suitable for home use, but the setting speed will be extremely low (up to 6 minutes for each nail), so medium-power equipment (18-36 W) is more popular, in which the average time costs are reduced to 2-4 minutes. Another positive aspect is the possibility of drying varnishes of almost all manufacturers in ultraviolet lamps.
The "cons" of this type of polymerization include:
- fragility of the device (no more than 1.5 thousand hours of operation);
- large dimensions;
- heating of the body during operation;
- non-critical drying of the skin of the fingers and hand;
- risk of mercury release if mercury-containing heating elements are damaged.

Kodi UV lamp
Advantages and disadvantages of drying in the LED device
The power of LED-devices (light-emitting diode) varies in the range of 12-45 watts, which does not allow them to be used for the polymerization of certain types of varnish. This type of equipment has a significant advantage in drying speed compared to UV lamps (polymerization when using led lamp takes only 10-30 seconds), but this property of the device may have Negative consequences: the lower layers of the varnish will not dry well and the coating will curl up.
TO positive characteristics devices include:
- compactness;
- environmental safety;
- low energy costs;
- elimination of overheating of the lamp body during active operation;
- resistance to mechanical damage (drops, shocks, etc.);
- durability (up to 10 thousand hours of operation);
- the presence of a timer and touch on / off (not all models).
But there are a number of disadvantages of such equipment:
- high price;
- the impossibility of replacing burned-out lamps (due to the lack of replaceable luminous elements, it is necessary to change the entire device);
- a fairly narrow range of light waves, insufficient for drying some types of shellac.
Features of Cold Cathode Fluorescent Lamp (CCFL)
Models of this type for home use are impractical to buy because of their high cost, so this type of equipment is extremely rare for beginners. At the same time, gas-light lamps have a lot of positive aspects:
- suitable for uniform drying of all gel polishes;
- do not dry and do not harm the skin of the hands;
- long service life, wear resistance;
- not energy intensive.
The polymerization time varies in the range of 30-180 seconds.
Every 3 weeks you need to carry out a correction, otherwise the overgrown nail will be very noticeable.

Shellac is a popular procedure carried out both in salons and at home. For a high-quality coating at home, a standard set of tools and devices for preparing, leveling and painting nail plates, and the polymerization process is required.
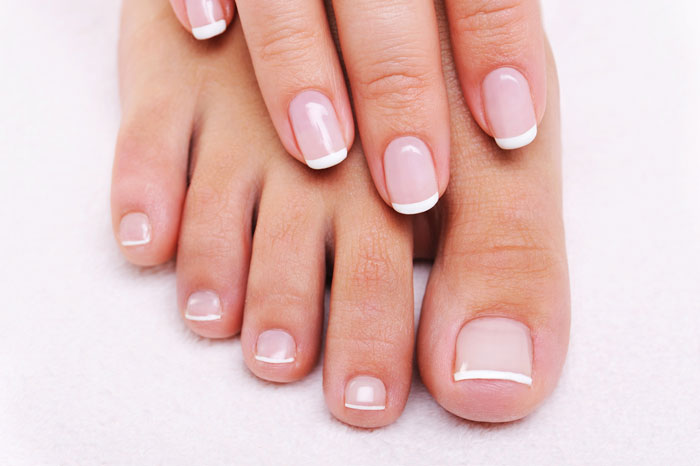
Shellac is an innovative development that combines gel and varnish. The material is popular with women different ages, as it has some advantages compared to regular home manicure and acrylic extensions. Shellac can also be used for a pedicure that will look perfect for a whole month.
Shellac Benefits:
- Saving time and effort. Shellac lasts about 2-3 weeks. Its durability will allow you to do a manicure much less often and rather quickly.
- Natural and well-groomed nails.
- The cost of coating with Shellac gel polish is less than building with acrylic gel.
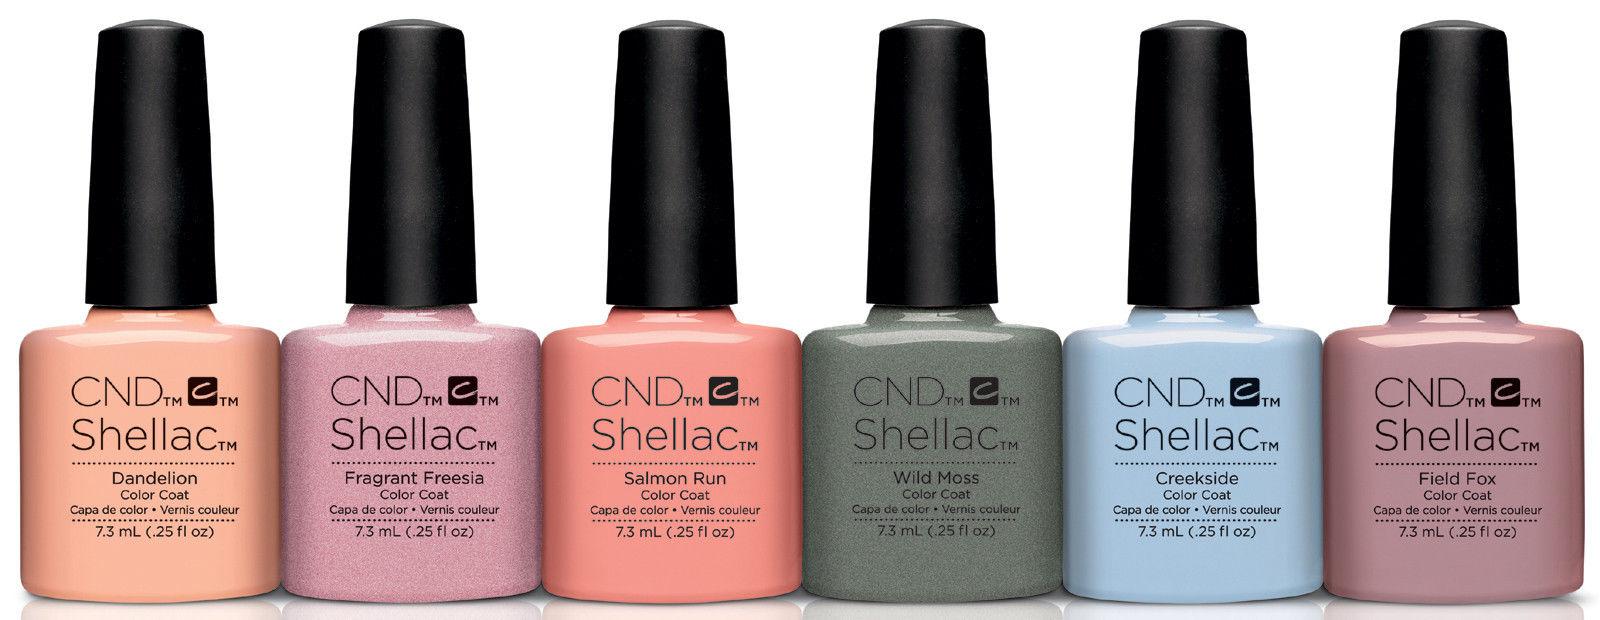
- Color variety. Creation of effective designs (more than 250 shades).
- Does not harm nails, quickly allows you to grow and strengthen your nails.
- Suitable for nails of any length.
- Gel polish dries quickly, so the manicure is done very quickly.
Now let's look at the shortcomings of Shellac, which are not so many:
- The considerable cost of the necessary tools and equipment, without which it is impossible to make a gel polish coating. Of course, with constant use, it pays off very quickly and the costs will be much less than a manicure in the salon.
- Removing Shellac is a rather difficult process, which is best left to the master for the safety of nail damage.
Not all women can use Shellac. Causes:
- thin and weakened nails. If the nail is accidentally bent, cracks will form on the coating. Manicure time is noticeably reduced.
- features of the work long stay hands in the water or many hours of daily work on the keyboard.
Not all women can cope with its independent application, you need to have such qualities as accuracy, accuracy and some skills in creating a manicure.
What do you need for a manicure?
To apply Shellac at home on your own, you need to prepare well and purchase all the tools necessary for the procedure. To do this, below is a list of what you need to buy.
An independent manicure using Shellac gel polish will cause some difficulties, therefore, for beginners, we recommend creating a monochromatic design. Having learned the skill and procedure in creating simple manicure, you can start trying color combinations, French, using patterns, stickers and sparkles.
List of required materials:
- Manicure set.
- Sanding file.
- Degreaser or acetone.
- UV lamp or LED lamp.
Attention! The UV lamp must be at least 36 watts. Exact time drying, see the instructions for the lamp. A professional LED lamp is much more powerful, keep in mind that the drying time of the varnish is significantly reduced.
- Shellac base.
- Shellac colored.
- Finishing coat (finish-Shellac).
- Sponges or napkins.
- Means for cleansing and removing the top sticky layer.
Shellac: the procedure for coating nails with gel polish at home
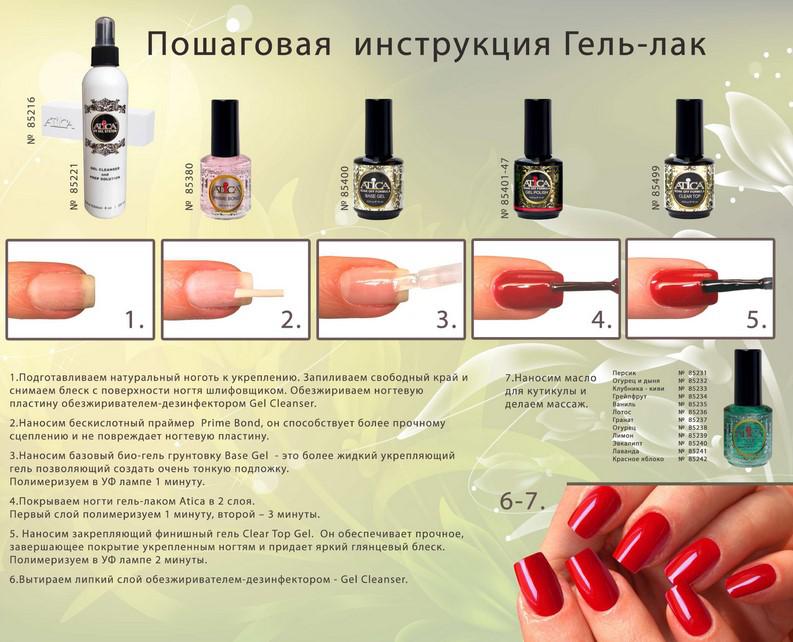
To succeed in creating an excellent manicure, thorough cleaning and preparation of nails for painting with Shellac gel polish is necessary. Without grinding and degreasing, Shellac will lie unevenly and you will have to redo everything. You should apply layers only in a certain order and proceed carefully. Without using a UV lamp, you should not try to apply gel polish, without ultraviolet it is impossible to wait for it to dry.
Shellac application instructions:
- Nail preparation. It should be trimmed, filed nails, cuticles removed with cosmetic liquids or by cutting.
- Grinding. Using a soft nail file for polishing, you need to grind the nail plates. You only need to remove the top shiny layer of the nail.
- Degreasing procedure. Wipe with acetone or special disinfectants.
Advice. The use of lint-free wipes is a must! Vata does not fit!
- Nails should be covered with thin layers of Shellac-base and seal (paint over) the end of the nail. Dry for a minute.
- Cover the nails with the first thin layer of colored gel polish. Dry for about 2 minutes.
- The second thin coat of colored shellac. Drying 2 minutes.
- Cover the nails with a top coat, applying it in a thicker and even layer, be sure to seal the end of the nail. Dry in the lamp for about 3 minutes.
- Remove the sticky layer with a cloth or sponge moistened with acetone or a solvent for the sticky layer.
- The shellac application process is complete.

How to remove shellac gel polish?
The procedure for removing Shellac is quite simple and safe for nails, it can be done at home. Shellac is primarily a lacquer, so it is easier to remove than an acrylic gel coat, no need to cut anything.
A special professional gel polish remover will help you remove a manicure without any hassle, but you can do without it. To do this, take aluminum foil, cotton wool or discs, acetone, orange or wooden sticks.
Removing gel polish from nails step by step at home:
- Wash your hands well with soap.
- Cut the cotton pad in half and peel. Cut foil for wrapping nails.
- Moisten cotton wool in acetone and attach to the nail, wrap with foil.
Attention! Make sure that the liquid from the cotton wool does not get on the cuticle or skin near the nail. This can cause an allergy or a burn.
- Repeat the wrapping procedure with all nails and wait 10-15 minutes. At this time, you need to do a light massage of the nails for easier removal of the gel polish.
- Next, you need to remove the foil and cotton wool and remove the softened gel. If there is nail polish left in some places, use an orange or plastic stick to clean the surface of the nail. Sand if necessary (if there are visible small residues).
- Treat with nourishing oil to avoid brittle and brittle nails.
When buying materials and equipment for manicure using Shellac, carefully monitor the quality of products so as not to harm your nails. Now on sale ready-made kits for home use, or you can buy all items separately.

A simple procedure for applying gel polish will allow you to show the beauty and neatness of your hands, give your nails time to grow and strengthen them. Shellac does not lengthen nails like acrylic gel, but simply simplifies the manicure process, making it more resistant and immune to most of the factors that wear off regular varnish.
To prevent Shellac from peeling off ahead of time, do not neglect the thorough removal of the cuticle and degreasing the nail. Lacquer peeling is also possible with health problems: vitamin deficiency, medication, hormonal disorders.
Shellac should be stored in a place protected from light, tightly closed. The result of the work depends on the correct storage and application. With gel polish you can create good options flawless manicure that can last 2-3 weeks on nails.
Gel polish at home: video
The question of how to do shellac nails at home is being asked by many fashionistas today, since the procedure in beauty salons is rather expensive. Every girl dreams that her manicure lasts as long as possible and does not upset with chipped edges at the most inopportune moment. That is why many manufacturers of products for these manipulations offer innovative resistant coatings. Gel polishes are truly impressive - they stay on nails for up to three weeks.
The most popular gel polish can be called a product of the Schellak brand - many fashionistas have their favorite shades from the shellac palette. But the application of gel coatings is accompanied by one difficulty - they require a special UV lamp to dry, so most often such a manicure is done in salons. If you are satisfied with gel polishes, and you plan to do such a manicure regularly, you should consider purchasing a UV lamp. And we will tell you how to make shellac nails at home, step-by-step instruction with the video will help to understand all the intricacies of this process. It is also described in detail how to remove shellac varnish at home without special work and without harm to the nail plate. 

What you need for shellac at home - what can you save on?
In addition to the aforementioned lamp, you will need a whole set of tools and tools that can cost a pretty penny. Let's find out what you need for shellac at home, and whether it is possible to reduce the cost of a manicure. So which lamp to choose and what can you save on?
It is not necessary to buy a lamp from the same manufacturer as the varnish. You can buy a less expensive lamp that will do the job just as well as the equipment from famous brands. In salons, often before applying the coating, the nails are treated with a special tool for the cuticle. It is quite possible to do without it by making the usual trimmed manicure or by pushing a small, neat cuticle with an orange stick. 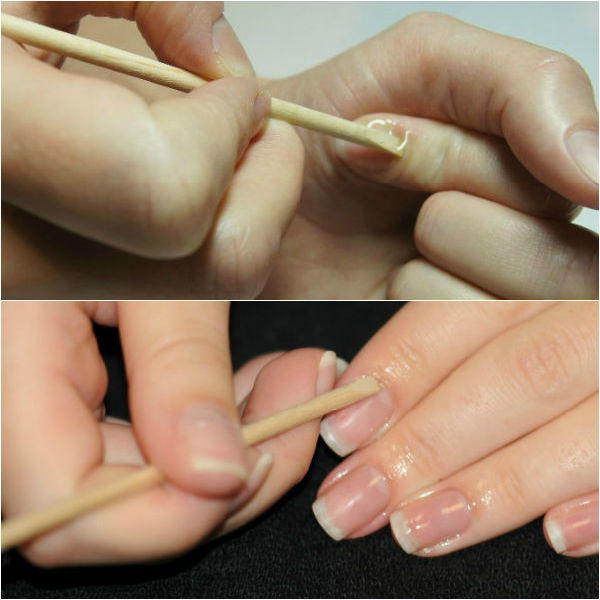

By the way, an orange stick can be replaced with a plastic one - it will cost less. To polish the surface of the nail plate, a buff is used, this tool is a rectangular parallelepiped with abrasive sides. Instead of a buff, you can take an ordinary small file. 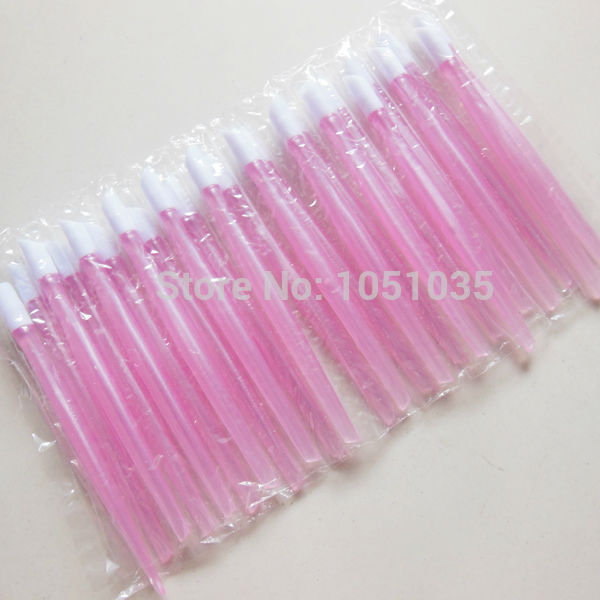


Before applying the gel coating, the nails must be degreased. In salons, this is done using a branded primer, and to cover nails with shellac at home, it is enough to wipe your nails with acetone-containing nail polish remover. 
After applying shellac, you need to remove the sticky layer, there is also a special liquid for this procedure, and we also successfully replace it with the aforementioned acetone-containing agent. Remove the sticky layer with lint-free wipes - a cotton pad or swab will not work. 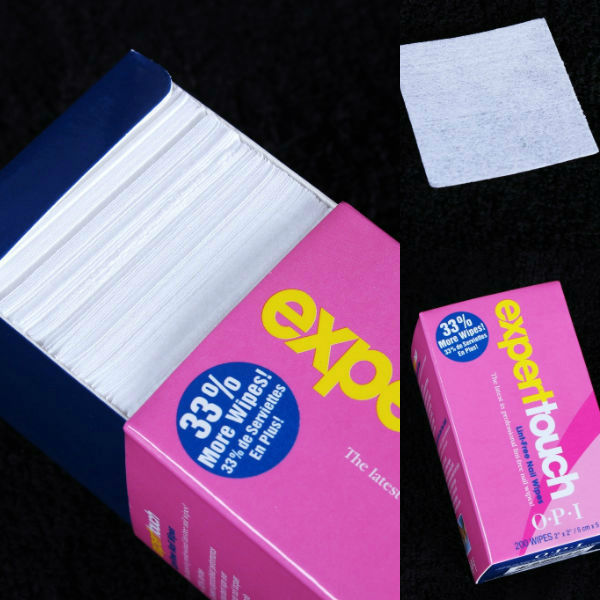
What else you should not save on - color (tinted) coating, base coat and top coat, all these products should be from Schellak. At least one color coat is required. If you are going to make unusual design shellac at home, choose several contrasting shades. 
Step-by-step instructions for applying shellac to nails (with video)
The procedure for creating a manicure with shellac differs significantly from the procedure for painting nails with ordinary varnish - it is much more complicated. Therefore, the first few times we recommend that you strictly follow the step-by-step instructions explaining all the steps when applying shellac at home.
- Tidy up your nails as usual - adjust the length, shape, take care of the cuticles, but do not use any creams and oils.
- Sand the surface of each nail with a nail file or buff. This will increase adhesion - improve the adhesion of the coating to the surface of the nail, which will positively affect the durability of the manicure.
- Apply a primer and wait for it to dry, or wipe your nails with an acetone cleaner using a lint-free cloth.
- Apply a thin coat of shellac base coat. The end of the nail must be sealed - the coating is applied to the end of the nail, and a little on its reverse, underside. This technique will help prevent the formation of chips, it can also be used when applying ordinary varnish.
- After applying the base, dry the nails in the lamp for a minute and a half.
- Apply a thin layer of colored shellac.
- Dry your nails in the lamp for a minute and a half.
- Apply a thicker layer of colored shellac, sealing the edge of the nail.
- Dry your nails under a lamp for two minutes.
- Apply a thick layer of top coat, capturing the end of the nail and the cuticle area.
- Dry your nails in the lamp for at least two minutes.
- Remove the sticky layer using a lint-free cloth and a special tool.
If you do a manicure in more than one color, but do drawings on your nails, you need to put your fingers under the lamp for a minute and a half each time after applying the elements of the next shade. A step-by-step application of shellac at home will take you about an hour, but if you get used to it, you can spend about 40 minutes on a manicure. After applying the base and the color component, sticky layers also remain, but they do not need to be removed - thanks to them, the manicure lays down evenly and more tightly, and lasts longer. If you want the color of the nail polish to be slightly transparent, you can apply the colored nail polish in one layer.
Look at the video of shellac manicure at home - this is helpful information for future masters:
How to make french design french shellac at home?
The French design of French shellac can be called universal, it is suitable for both the office and the party. How to make it beautiful and neat - we will consider further. Many women of fashion have adapted to making French nail art using stencils, but we are in a hurry to upset you - French shellac is done by hand at home. The use of stencils is unacceptable, as they will leave sticky marks, and the finish coat will not be of sufficient quality, which is fraught with the appearance of chips and cracks for several days. In order to draw a white or colored edge of the nail, you will need a narrow brush. To make the result flawless, first practice drawing a smile line with ordinary varnish. 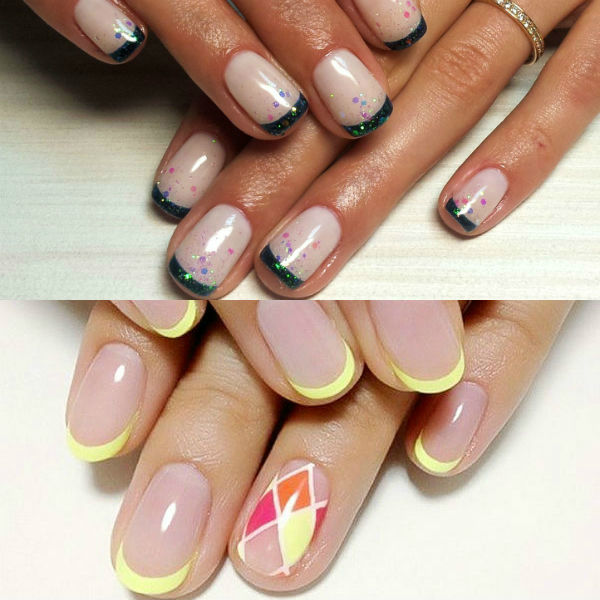
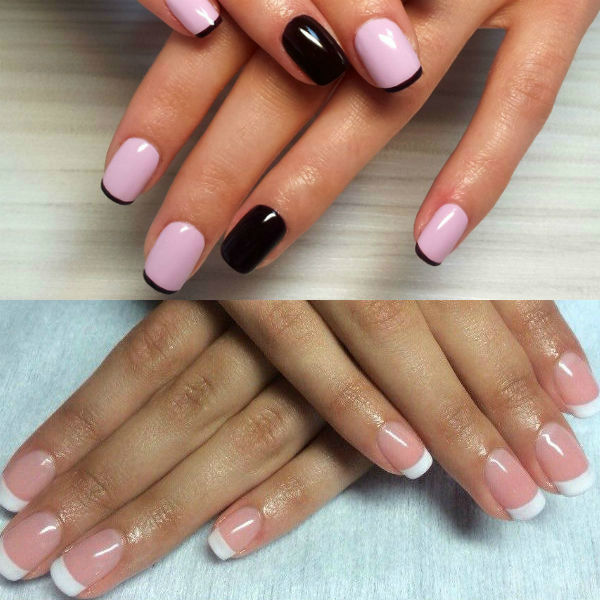 Before you start creating a jacket, you should not carry heavy bags or wash by hand. If the muscles of the arms were in tension, the hands would tremble, and an even smile would never work. Pour some white polish onto a piece of foil to make it easier to dip a thin brush into the polish. Press the brush well on the edge of the bottle and make two strokes from the side edges of the nail to the middle, drawing the border of a smile. Draw a solid line exactly along the strokes. Now color the smile area with dotted movements, touching the original line as little as possible. After applying white polish, keep your nails in the lamp for a minute and a half.
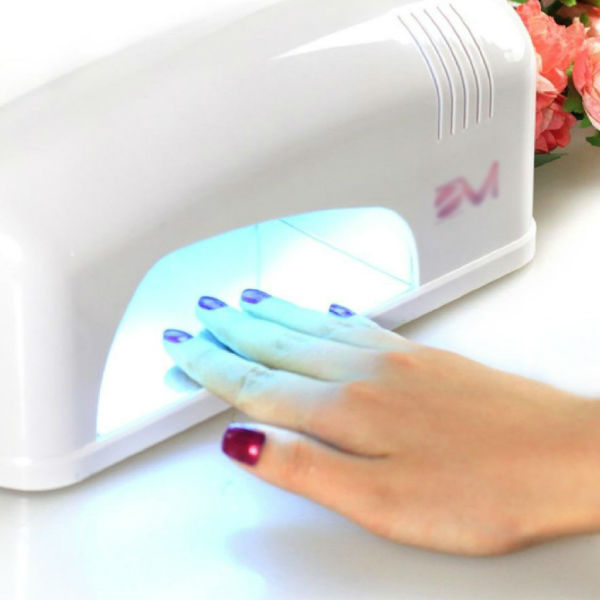
How to remove shellac varnish at home: you can remove and erase in different ways
And now you fully appreciated the advantages of gel coatings, and the design honestly served for several weeks. It's time to learn how to remove shellac at home and at the same time not permanently ruin the nail plate. This can be done in different ways.
Special kits are sold, which are used by masters in salons. These are pieces of foil with small fragments of sponge. These expensive kits can be successfully replaced with cotton pads and baking foil, cut into pieces. right size. Schellak recommends that you remove the gel coating only with a special branded shellac remover, but experience shows that a regular nail polish remover, which costs several times less, is fine.
Before removing shellac nail polish at home, saturate cotton pads with the product and apply them to each nail. Now wrap the pieces of foil around your fingertips and press the cotton pads firmly against your nails. Soak the foil on the nails for 15 minutes, periodically pressing on the cotton. Remove the foil and remove the shellac from the nails with an orange or plastic stick. If you applied shellac too thickly, it may be necessary to repeat the procedure for how to remove shellac at home. If this does not help, and in some places the varnish remains, cut it off with a manicure file, after which do not forget to lubricate the nails and the skin around the nails with cuticle oil to avoid drying out. 
Now you know how to apply and how to remove shellac at home. Perhaps soon this kind of manicure will become your favorite way to decorate your nails. Finally, we suggest watching a video of shellac manicure at home in order to finally fix in memory all the subtleties of this process.
The most popular manicure option in our time is shellac nails. This material is very strong and quite durable. Shellac lasts about 15-20 days. After that, it is necessary to make a correction or removal of the coating, followed by the application of a new layer.
The technology is still relatively new, but many women of fashion have already managed to study it very well, having learned how to do such a manicure at home. If you carefully delve into all the nuances, then it is really not difficult, but beginners at the first stage often do not know what materials and tools will be required for work.
What is needed for shellac?
It is best to buy medium-priced, but still certified funds.
The use of cheap and low-quality drugs can lead to allergies and other disastrous results.
Degreaser or primer
This tool is necessary for the treatment of nails before applying shellac.
The primer gently and gently dries only the upper surface of the nail plate, without affecting the deeper layers.
Its cost starts from 110 rubles.
If you want to save money or just didn’t buy a degreaser on time, then it can replace regular medical alcohol.
 Primer.
 Base
This is a colorless gel that serves to strengthen the adhesion of shellac to the nail plate.
Its cost varies depending on the brand: from 250 to 1700 rubles.
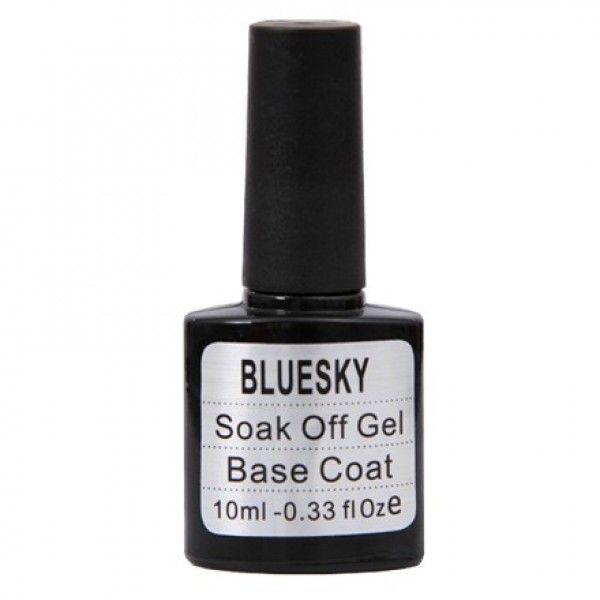 Base.
Base. Shellac
After such a thorough preparation of the nails, you can begin to apply a decorative layer. You will need directly shellac of one or different colors.
The price range for these products is very large: from 150 to 1400 rubles.
For a set of several units, you will have to pay about 2000 rubles.
 Shellac.
 Finish Gel
This tool works as a fixative.
It is used at the last, finishing stage of the procedure.
Costs from 200 to 1700 rubles.
 The finish is gel.
 Cuticle oil
During the shellac application procedure, the nails are placed under a special lamp, which can greatly dry the cuticles.
To restore it, you must use oil. grape seeds or jojoba.
The average price of one small bottle is about 250 rubles.
 Cuticle oil.
 Remover
This tool greatly simplifies the removal of old shellac. It is better not to use the usual acetone nail polish remover for this purpose.
Special preparation with caring components in the composition costs an average 100 rubles.
 Shellac remover.
 Foil
Aluminum foil is needed to cover the nails during the action of the softening liquid.
It can be purchased from online stores for 180 rubles.
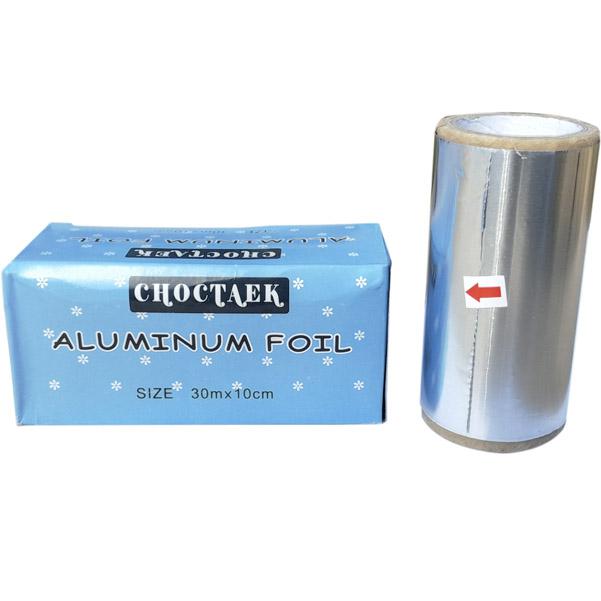 Aluminium foil.
 Sponges
Cotton pads are soaked in a softening liquid and applied to the nails during the removal of the coating.
You can buy them in any supermarket for 50 rubles.
Lint-free wipes
These products are used for polishing nails before and after applying shellac.
In specialty stores, they are sold in the form of rolls, similar to skeins of adhesive tape, or in stacks in boxes.
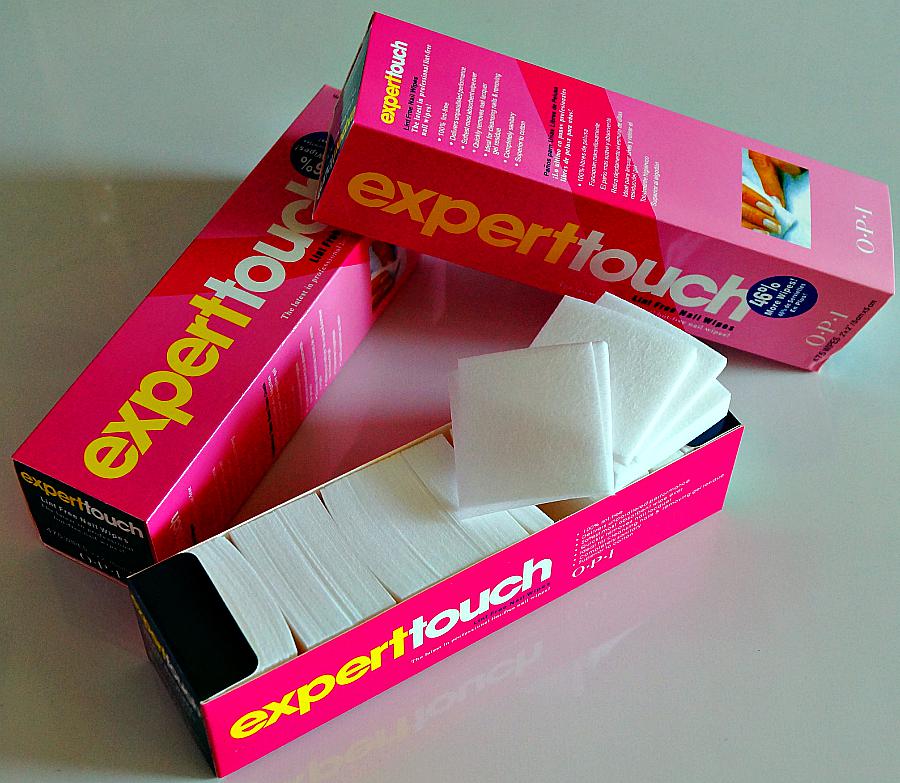 Lint-free wipes.
 Price - from 270 rubles.
On the video: what you need for shellac at home, a list
Required Tools
special lamp
Such lamps for manicure are used for the purpose of polymerization, that is, the hardening of the shellac layer.
There are three types of lamps:
- ultraviolet;
- LED LED-lamp;
- gas light or fluorescent.
The most common are ultraviolet lamps.
LED - dry the varnish much faster, but they are not suitable for all types of varnishes.
ultraviolet lamps stand from 700 to 6000 rubles.
LED - from 900 rubles.
Fluorescent - about 3000 rubles.
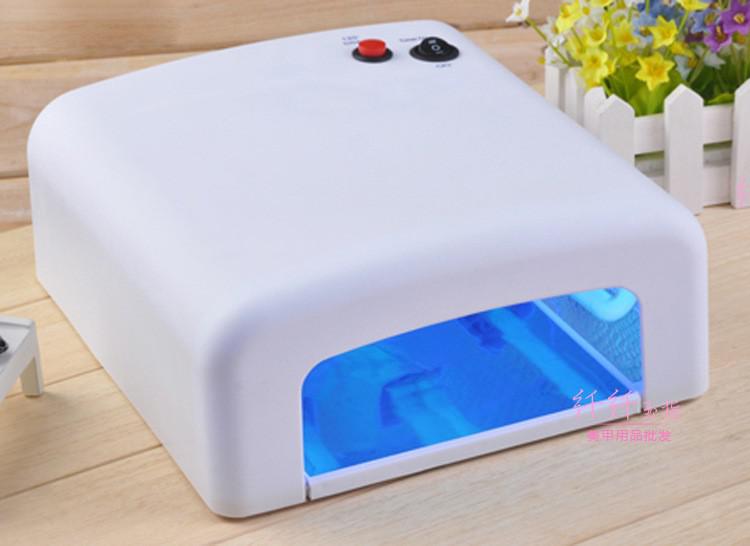 Lamp.
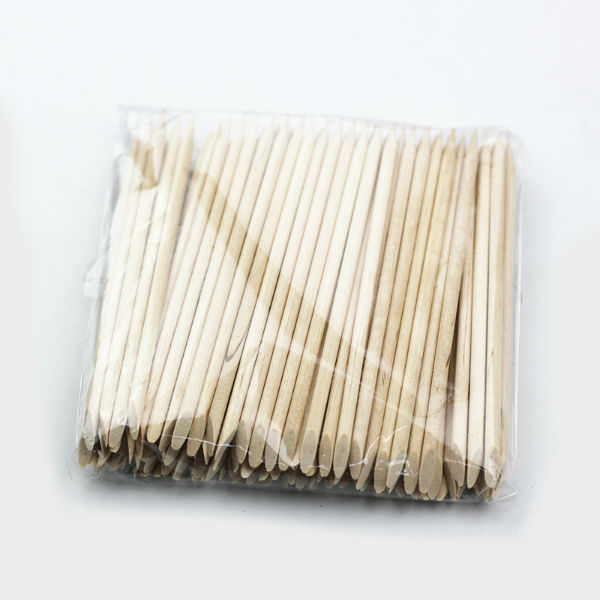
Lamp. orange sticks
This multifunctional tool will help spread the gel, push back the cuticle, create a pattern and stick decorative tools.
Price - from 36 rubles per set.
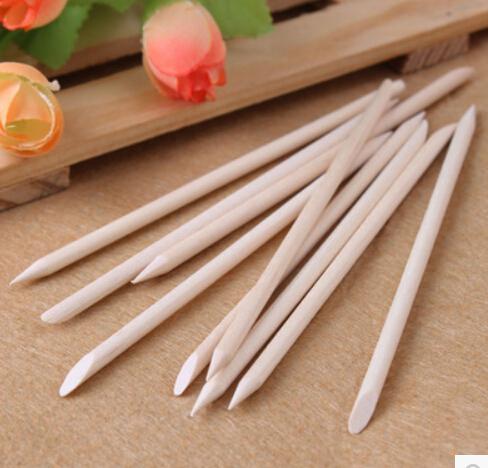 Orange sticks.
 Tweezers
Used to remove cuticles.
 Tweezers.
 brush
Needed to remove dust from nails during filing.
Price - from 35 rubles.
 brush.
 Pusher
This special a metal stick with a spatula on one side for pushing back the cuticle, and on the other - a sickle-shaped blunt knife for removing pterygium.
Worth such a tool about 150 rubles.
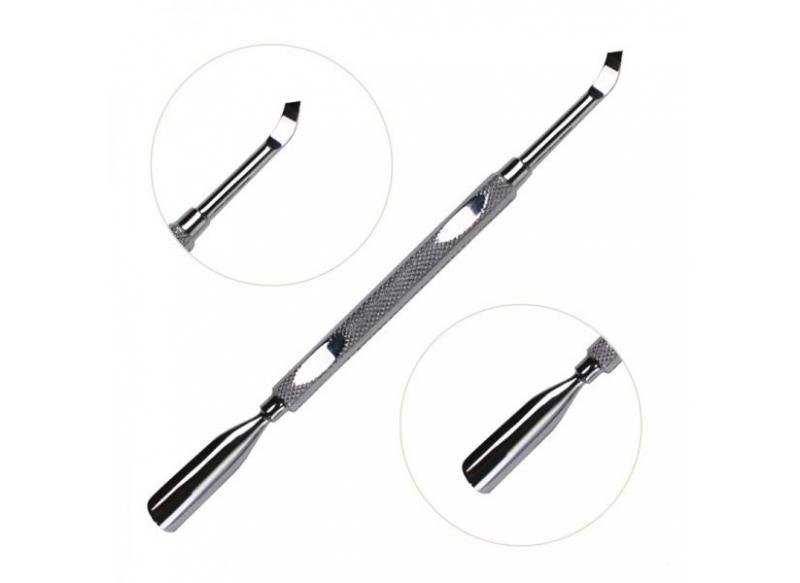 Pusher.
 buff
This is a volumetric nail file, which is used for filing and correcting natural nails. They also remove gloss.
Buffs can vary in hardness.
Price starts from 40 rubles.
 Buff.
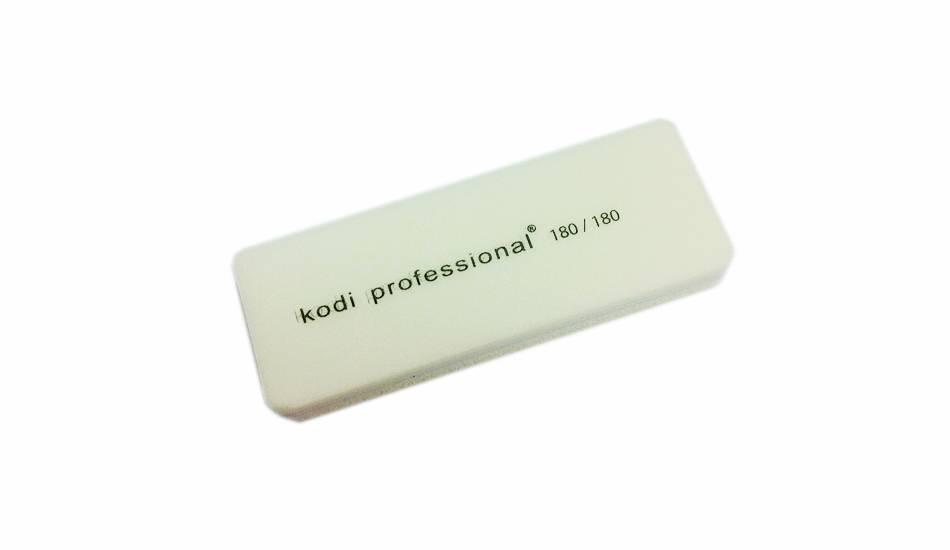
Buff. Nail files
Files also file natural nails.
When choosing, be guided by the degree of roughness, measured in Gritts.
The higher this indicator, the more fine-grained nail file. For filing natural nails, a file of 180 Gritt is enough.
Price - from 30 to 400 rubles a piece.
 Files.
A review and shades of hair dye Prestige
And take the instructions for using Palette hair dye.
You can take advantage of the offer of many manufacturers and buy special kits that will include everything you need.
But, as practice shows, usually in the kits there are completely useless things that only increase the cost.
It is better to be patient and choose everything separately.
Shellac is a combination of lacquer and extension gel.
He possesses all best qualities varnish and gel: good color range, strength, resistance to external damage, ideal density and high gloss. It contains no chemical compounds harmful to nails.
Shellac is good for thin and brittle nails, it gives them extra hardness. Hard nails, on the contrary, make them more flexible.
Plus, shellac stays on nails for up to two weeks. It does not chip off on the sides of the nail plate and the manicure looks attractive for a long time. Shellac has to be removed only for aesthetic reasons as the nail grows.
One of its advantages is also the fact that when using it, you do not have to saw off the nail plate, as when building. Shellac is ideal for a pedicure, because. can last up to three weeks.
shellac palette
Currently, the shellac palette consists of 36 colors and in the near future the color line will be supplemented with new shades. colors. You can combine colors with each other, achieving unique tones: from classic to original extreme.
How to apply shellac at home
![]()
If you do not have any experience in applying shellac, perhaps you should contact a manicurist. After one or two visits, you will be able to independently master the technology of applying shellac and learn all the subtleties of this procedure.
But, if you still decide to conduct an experiment and try using shellac at home, then follow the step-by-step instructions.
Step 1
Give the nails the desired length and shape with a nail file, trim the cuticle. Sand the surface of the nails with a nail file and remove all dust with a brush.
Step 2
Treat the nail plate with any antibacterial drug.
Step 3
Degrease the surface with alcohol and make sure that the nails are perfectly dry, otherwise the coating will not adhere well.
Step 4
Apply a base coat and expose it to UV light for 2 minutes. The technology of applying shellac involves drying under UV rays after each application of the gel for two minutes. The sticky layer that remains after drying does not need to be removed.
For polymerization, it is better to choose a 36-watt lamp if you are not limited in finances. It allows you to dry all the nails on your hand at the same time, which saves a lot of time. But you can take the most common option at 9W. She also dries any gel polish, then you will first have to dry 4 fingers of one hand, then 4 fingers of the other, and then 2 large ones.
Step 5
Apply the base color with a brush from the bottle to the sticky layer of the base coat. The technology of applying shellac involves drying under ultraviolet rays after each application of the gel for 2 minutes. Experts advise covering nails with shellac in 2 layers.
Step 6
Finally, apply a top coat and dry for 2 minutes. The fixer should not get on the cuticle and the skin around the nail, otherwise this may lead to a violation of the integrity of the coating and to its detachment.
Step 7
Take a lint-free cloth, moisten it with alcohol and remove the sticky layer left after the fixer.
Now your nails should be even, smooth, shiny, durable and strong. And you can apply any moisturizing cuticle oil and rub it in gently.
How to remove shellac at home
Removing shellac at home is quite simple. Prepare 10 sponges, a wooden or orange stick, a special branded nail polish remover - shellac remover or nail polish remover with acetone.
Soak the sponge well in the liquid, wrap the nail in it and hold for 10 minutes. After that, remove the remaining coating with a stick. Your nails will be clean.
You can arrange a little "breath" for your nails: make firming and nourishing baths, treat the cuticles with moisturizing oil. And again proceed to a beautiful manicure with shellac!
Popular new items, discounts, promotions
Reprinting, publication of an article on websites, forums, blogs, groups in contact and mailing lists is NOT allowed


