Training sheet for monograms on nails. We draw monograms on nails with gel polish: step by step instructions.
To create a beautiful manicure, it is by no means necessary to have “golden hands” or special education. Fashionable monograms on nails is a technique that everyone can do with a little bit of effort.
Design Features
A monogram is a special drawing technique in which the pattern is made by interlacing numerous lines. Very often, women of fashion, with the help of such images, wrote individual letters or even whole words on the nail plates. Fundamentally, monograms are not much more complicated than simple floral or romantic designs.
Exists several types of monograms on nails:
Video: lace on nails
video
How to draw a monogram
Simple curls can be created with a needle and ordinary varnish, but such a manicure will not always be appropriate.


We will tell you step by step how to draw monograms on nails:
- Prepare your canvas. To do this, remove all the old layer of varnish, cut your nails, file their tips so that they are even. After that, dry your nails well. Do not apply cream on your hands, otherwise the varnish will lie unevenly or quickly begin to peel off;
- After you need to do a classic manicure. It is on this design that the monograms look most attractive. You can simply paint your nails with a solid nude or light pink lacquer. It is advisable to cover each nail in two layers, for greater color intensity;
- Now using a thin brush for painting with varnish, carefully begin to curl. For the first time, only one painted nail will be enough. For example, draw a monogram on the ring finger;
- The easiest way is to start drawing from the side of the nail, gradually moving to the middle. Can be carried out simply smooth lines, rounding them to get an open circle, you can experiment a little and make wavy interlacing patterns. Work carefully so that the monograms on the fingers are as identical as possible;
- After we cover our manicure with a fixative or sparkles to give a holographic effect.
This is the easiest option, depending on the combination of colors, you can create a stylish manicure for work, study or a simple walk. Be sure to watch the master class in the video, it clearly demonstrates how to make monograms on long nails.
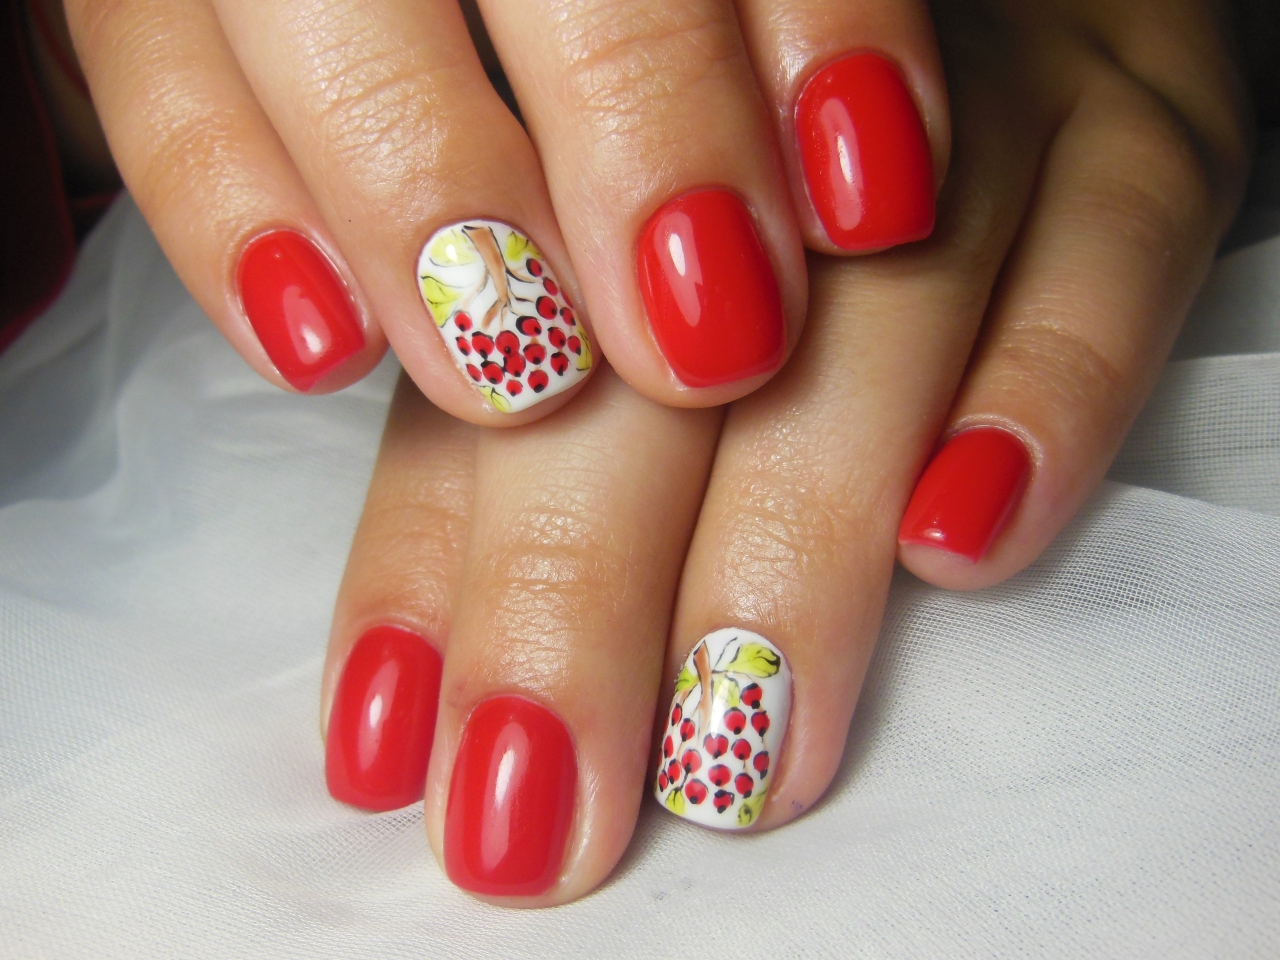
 Photo - Patterns for monograms
Is there some more second interesting way - a combination of curls and other manicure techniques. For example, the combination of a liquid stone on the nails and a monogram looks very stylish; this design is perfect for celebrating the New Year, a birthday or a disco. In addition, we recommend that you try covering the weaves with beads or rhinestones (you can also use velvet powders).
How to do monogram evening manicure:
- Prepare your nails as described above;
- It is better to work with gel polish and acrylic paints, so you will have a more durable manicure. At the same time, it is much easier to paint with acrylic than with ordinary varnish;
- Make a jacket on your nails using shellac. Cover the nails with a fixative, dry it for a couple of minutes under an ultraviolet lamp;
- Now, starting from the side of the plate, draw a line. Lead it up to the white edge, but try not to go over it. Make a rounded strip, then, as it were, open it with the help of additional rulers extending from the main one;
- After completing the pattern, insert a liquid stone or bead into the center of the circles. Light or iridescent rhinestones will also look great;
- On top, apply another layer of fixative for more shine and place your nails under a UV lamp for a few minutes.
Advice: it is best to make curls in a contrasting color from the base, then they will stand out beautifully against the background of the plate. If you want to create a soft manicure that enchants with its simplicity, then try drawing lines in pearlescent or white.
If you can’t come up with a painting on your own, then look at our selection of photos and example drawings of how masters make monograms on nails. Write in the comments your options for patterns, as well as your opinion about this style of manicure.
Every woman should have well-groomed hands with a beautiful, neat manicure. Most often, for this, ladies visit beauty salons and turn to the services of manicure masters, but it’s not at all difficult to learn these tricks and do a manicure on your own. Naturally, for this you need to get acquainted with the basics of this wisdom. Painting nails for beginners step by step with a photo will help you cope with not at all challenging task as it seems at first glance. Below are several options for painting, Chinese and Japanese techniques. After carefully studying the instructions, you can make beauty yourself at home with your own hands.
Chinese nail painting technique for beginners
The Chinese technique of painting nails is very peculiar. Working with it, first of all, it is necessary to visualize the drawing process - petal by petal. For getting beautiful result the nail is covered in one layer using a special tool, which is pre-applied with paint in several layers and different colors. The effect is amazing. The pictures seem to come to life on the nails.

You will need:
- Acrylic paints. It is preferable that the basis of such paints is water and silicone. With the help of these paints, it will be easy for you to draw beautiful drawings, the paints are viscous and thick, evenly and easily fall on the nail.
- Brush. It's best to have a few different sizes. Professionals work with expensive professional brushes, but if you are a beginner lover of painting on nails, a few artificial brushes will be enough for you. Eat different types brushes - brushes, liners, fan brushes, flat and beveled. They are used to draw a variety of lines and patterns.
- Sticks or skewers for drawing small circles and dots.
- A jar of water.
Execution steps
It is best to purchase artificial false nails and practice the technique on them, and having stuffed your hand well, start drawing on your nails. Prepare everything necessary materials, you can try to copy the first drawings from pictures, and only then you can give free rein to your imagination.

For example, you can familiarize yourself with the stages of drawing a Chinese rose:
- You will need three colors acrylic paints: white, black and red, as well as a wide brush. First of all, we lower the brush into red, and then into white paint and with the help of a small amount of water and a palette, we shade the paints to get pink highlights.
- We make a smear, in the form of a rounded droplet, underestimate left side. This is the first petal of the future flower.
- The second stroke is done side by side, but slightly higher than the first. This is the second petal.
- Two more petal strokes of a similar shape, but a little larger in size, are done perpendicular to the previous two.
- To complete the shape of the flower, add a couple more petals in empty places, choosing the required size for them.
- Using a thin brush and black acrylic paint, circle the petals around the edge, add small strokes. It will be very beautiful if you draw a couple of unopened buds on several nails.
Art painting of nails with acrylic paints
For the design and painting of nails, gels, varnishes, bio-varnishes, various types of enamel and paints are used. It is most convenient to create drawings on nails using acrylic paints. They dry very quickly, do not crack, wash off with water. With their help, bright volumetric images. Art painting of nails for beginners with acrylic paints will be clear to you after familiarizing yourself with the process of its implementation.

Necessary materials and tools
You will need:
- Acrylic paints. The more flowers you have, the more diverse the drawings can be brought to life. You can buy them in a specialized store or stationery.
- Brushes. It's best to have several, in different sizes.
- A jar of water.
Execution steps
After you decide on the background, which is recommended to make a pastel shade so that the drawing looks contrasting on it, proceed directly to drawing. For example:

- We do a manicure and a neat shape of the nails.
- Before applying the base, the nails are polished and degreased with a special tool or a regular nail polish remover.
- We cover the nails with a base.
- Cover with a base color.
- We dry the nails covered with the main varnish.
- We focus on the ring finger. Draw the wings of a butterfly with white acrylic paint.
- By analogy, let's paint the rest of the fingers, with a wavy effect, in descending order.
- With bright colors we draw leaves and twigs of flowers on all nails.
- We fix everything with a transparent finish (special fixing agent).
Japanese nail art lesson for beginners
IN Lately Japanese motifs are very popular in nail design. Cherry blossoms, a variety of hieroglyphs look very harmonious on neat nails. Such beauty can be created using acrylic paints. This is not quite a simple painting of nails. Let's take a closer look at her technique.

Necessary materials and tools
- Acrylic paints. The more flowers you have, the more diverse the drawings can be brought to life. Need pastel, pink, lilac shades. Contrasting patterns look beautiful on nails of medium length.
- Brushes. Different sizes.
- A jar of water and paper towels. If you accidentally draw an extra line, using a brush dipped in water, it is easy to remove it from the nail.
- Base and fixer, white lacquer.
Execution steps

- We check the readiness of your pens for drawing. A neat manicure should be done, the nails polished and aligned, and degreased.
- On a transparent base, paint a light pink varnish. This will be our background.
- We make chaotic strokes over the entire surface of the nail with lilac acrylic paint. They should be of different lengths and directions.
- Having moistened the brush in water, we smear the lilac lines with it. We get a beautiful blurred pink-lilac background.
- We draw cherry branches with black acrylic paint, they should be directed in one direction on all nails.
- At each branch, using a skewer, we put dots with pink acrylic, these will be buds. Next, with a brush, draw flowers, with the same paint.
- We draw along the contour of pink flowers with a thin brush with white paint. It will make the flowers voluminous and more contrasting.
- juicy pink draw the core in the flowers. It will add even more volume to the buds.
- With a yellow dot, we complete the drawing of cherry-sakura flowers. Imagine how it looks in nature, a similar image should appear in the picture.
- In a light green color, add a few leaves. Do not overdo it with the quantity, two or three leaves on one nail is enough.
- For contrast, draw the edges of the petals of large flowers with black acrylic.
- If there is a lot of empty space left on the nail, put a few dots in white, as if the effect of falling sakura petals in the wind.
- We cover the nails with a finish and dry well. Your masterpiece is ready.
It is not difficult to make monograms on nails, and the resulting pattern, drawing looks like a real work of art. Any girl can learn such a design, the main thing is to have patience and a desire to write out beautiful ornaments. Now you will learn how to draw monograms on nails, what tools are useful for this.
For those who are just learning how to make monograms, we recommend using the following tips so that the intended nail design turns out the first time:

Simple ideas for creating a manicure with monograms
Consider step by step how to do a monogram manicure:

We do a manicure with voluminous monograms
Volumetric nail design is done using acrylic powder:
- On the prepared surface, after applying the main color and top, you need to make swirling lines. Curls should be wide.
- From above, the pattern should be plentifully covered with acrylic powder, dry the nails in the lamp. If there is a desire to make curls in a different color, then after drying, you need to apply a monogram of a different color, then acrylic powder again.
- Remove excess sand with a soft brush.
- Walk with a thin brush over the dyed nails, not forgetting to sprinkle with powder on top.
- The design is ready. There is no need to overcoat the lacquer.
Design with monograms and rhinestones
Many masters complement manicure with monograms with rhinestones. This combination of brilliance and refinement of lines gives charm to the hands, makes the brushes graceful and expressive.
You need to place the stones carefully, focusing them in one place, and not all over the picture. For example, you can fill a hole with them, make a beautiful decoration with rhinestones on one nail, or simply glue a large stone in the middle of the plate.
Rhinestones can be applied to any top coat. The main thing is that the stones are combined with it, so for a manicure with monograms it is better to use silver or golden rhinestones.


French manicure patterns
This version of nail art is very cute and unobtrusive. At the same time, many masters go beyond the classics, make a color jacket, side or moon manicure. The curls bred along the side of the French manicure look very nice.
In an original and unusual way, you can place the monogram on the jacket: make an arch in the middle of the nail or divide the plate in half with the monogram.
Despite the fact that French is a classic of the genre, you need to stick to fashion trends in manicure. It is recommended to draw monograms on short nails or middle length. On pointed, square or overly long nails, the image will look ugly and unfashionable.
If you want to do something special on your nails, but not very defiant, then a jacket with monograms is what you need. With this design, you can go to work, dates, business meetings. He looks restrained and neat.
Original monograms all over the nail plate
For those masters who have already filled their hands and know how to quickly draw curved lines on their nails, you can try to make the same patterns on all nails. But if it is difficult to perform such calligraphic miracles, then you can use stamping - metal plates with ready-made drawings.


This nail design is perfect for winter. beautiful lines will be associated with the patterns on the windows, traced by frost in a fierce winter.
The design on the nails of the monogram, at first glance, may seem complicated. But with the right tools, high-quality paints, such a nail design does not cause difficulties in creating. You can train to make curls on special cards, tips. Having stuffed your hand, you will be able to create incomparable and complex patterns for yourself and your friends.
We draw monograms on the nails: step by step instructions
You can create a beautiful and interesting manicure at home. Moreover, there is now big variety techniques that can be used in the process. A fairly popular technique is drawing monograms with gel polish. These are curls, spirals of any shape.
Varieties of monograms
Drawing monograms is a simple manicure technique, you just need to have a little imagination and patience. There are several types of curls:
When creating such a manicure on the nails, you can use ready-made schemes or come up with something original. The main thing is that the resulting pattern is clear and uniform, with smooth transitions.
Material selection
 To draw monograms, you need to bring a thin brush with which you can draw a neat line. In addition, professionals recommend using the following tools during work:
- Styper. It is suitable for creating both simple and complex patterns.
- A brush with an oblique tip. It is used for even distribution of varnish on nails, as well as for the image of curls.
- Dots. It is used to draw dots and small elements.
Additional Information! You can make a brush for nail design with your own hands. To do this, take a brush of old varnish, carefully clean it from its remnants. Then it is shaped in such a way that it turns out to be thin. In a similar way you can make a beveled brush.
Painting technique with ordinary varnish
 Often girls have a question: “How to draw monograms on nails?” To do this, you need to follow a certain technique. The process of drawing a pattern consists of just a few steps:
- First you need to prepare your nails. To do this, they should be filed, give the desired shape. It is also important to remove the cuticle by cutting it with a special tool. It is also necessary to sand all the nails and degrease them so that the varnish lays down better.
- Apply a clear polish or base coat to your nails, wait until it dries. It is easier to draw a pattern on it, and the resulting manicure will retain its original appearance for a long time.
Additional Information! Now you need to select a tool. It is better to use a special brush. But, if it is not at hand, a needle or a toothpick will do.
- At this stage, proceed directly to the image of monograms. Start at the base of the nail plate and move towards the edge. The tool must be dipped several times in varnish so that the resulting pattern is bright. You can decorate the manicure on the nails with sparkles, rhinestones, stickers.
- At the end, a layer of colorless varnish is necessarily applied, after which the nails must be dried.
In the process of work, you need to take a little varnish so that the line is even and does not spread. When drawing complex monograms, you need to wait until the first curl dries up, and only after that move on to the image of the second.
Monograms with acrylic paints
 Gel manicure on nails turns out to be more beautiful and stable. He doesn't change his appearance over three weeks. Therefore, many decide to do a manicure using just such a coating. In this case, the monograms are painted not with varnish, but with acrylic paints:
- To do this, the nail surface is prepared by leveling its surface. It is important to sand the nail plates, and apply a degreaser on top.
- Now the base layer of gel polish is distributed over the nails. It is transparent and has a sticky base. After that, you need to put your hands in a UV lamp until the surface dries.
- You need to do a French manicure or apply the main color of the varnish on all nails. At the same time, on the nameless and middle fingers it is recommended to apply the same color, but a shade lighter. It is on him that the pattern will be applied. You should start drawing a monogram from the base of the nail, moving towards the edge. It can be curls, an ornament, an openwork pattern.
You can draw a monogram using ordinary varnish, as well as using shellac or acrylic paints. If you can’t draw a drawing yourself, there are ready-made stickers, as well as stencils, on which you can easily draw patterns.
Photo of monogram coating on nails


Behind long history of life, manicure has reached its peak only now, when the possibilities of artistic nail painting are combined with the safety of technology.
So decorating nails with monograms, beloved by many nail art, today can be done with gel polishes. The main thing is to stock up on the necessary equipment and patience, and experience can always be learned.

Manicure with monograms and gel technologies
In general, a monogram (from the Polish “knot”) is a calligraphic font in which the initial letters of names and surnames are artistically intertwined, forming intricate patterns.
In the old days, only representatives of the aristocracy or royalty had the privilege to use this monogram. Envelopes, medallions and rings were decorated with monograms. Monograms were embroidered on clothes, bed linen and other personal items.
Ah, if I knew grand empress Catherine, who left a huge "monogram heritage", how accessible this luxury will be to the people! Indeed, today the monogram has lost its estate and symbolism, having spread in decoration techniques - in particular, in nail art.

You can draw monograms on nails with ordinary varnishes, but gel polishes have undeniable advantages: long lasting (up to 4 weeks), do not fade or chip, strengthen the nail plate, do not contain DBP and formaldehyde.

To draw monograms with gel polish, you will need the following set of materials and equipment:
- base, background, contrast and finishing gel polish;
- UV lamp for drying gel polish;
- means for degreasing the nail plate;
- a thin brush for drawing monograms (stiper);
- stencils and training tips for beginners.
Shall we start?

We draw monograms on nails with gel polish: step by step instructions
Regardless of whether you draw monograms manually or use stencils, you will have to go through all the standard stages of applying a gel polish step by step. So…
Step 1. Preparing the nail plate
- Model the shape and match the length of the nails.
- Remove or push back cuticles (without steaming).
- Give your nails a slight roughness with a soft buff.
- Degrease your nails with a specialized tool or alcohol.

Step 2. Applying the base, background and finish
- Cover your nails with a base gel polish - send under a UV lamp.
- Apply a background gel polish - and dry again under the lamp.
- Finish the background with a top - do not forget about UV curing.
- Seal the tips of your nails with each coat.
VIDEO INSTRUCTION
Step 3. Drawing monograms
- "Buff" the finish coat so that the monograms lie as if nailed down.
- Pick up gel polish on the tip of a thin brush, transfer a voluminous drop to the nail and stretch in the desired direction with a smooth and rounded line.
- Do not "overdo it" with patterns - monograms should not weigh down the nails.
- Send your nails with monograms to dry under a UV lamp.
- Apply a "finish" and dry again. Done - enjoy!

Actually, everything, except for the main thing - how to draw beautiful monograms? If the hand in the field of artistic painting of nails is full - be guided by your own imagination or peep the "prototypes" on the Internet.
With total “curvature”, use the stamping technique (creating patterns using “stamps” on metal plates) or slider design (applying stickers).

By the way, a rare nail master is able to distinguish artistic hand painting from sliders.
If you have a persistent desire to master the art of hand painting, get your hand on the training cards, circling the finished “curls”, transfer the skill to the tips, and only then proceed to the design of your nails.

VIDEO DESCRIPTION
- monograms are drawn in one color, highlighting individual lines with color does not carry a semantic load and violates harmony;
- before applying lines that will intersect with already drawn “curls”, the nails should be dried in a lamp;
- for the everyday version, the background and color of the monograms are chosen in a similar tone, for the “weekend” design, the contrast can be bolder;
- the use of additional "decorations" is not prohibited - powder, rhinestones, gold and silver sand, liquid stones(not generously, moderately, so as not to distract the attention of the "spectator" from the main plot - curls);
- and the tendency to emphasize one nail is still in trend, which is very helpful for beginners who practice drawing “curls”.
By the way, is the “royal” painting of nails appropriate in everyday life?

Where and with what to "walk" the monogram on the nails?
“Putting” monograms on nails is one thing, “walking” them into people is another. Sometimes it's better to stay at home so as not to be considered tasteless. If the classic (solid manicure or jacket) goes with everything and always, monograms require a special approach.
When art painting nails dated for a holiday or a solemn event, you can allow an outfit, the degree of which will not be inferior to the “loudness” of nails. But even in this case, prints and patterns in clothes should be avoided so as not to lose face behind the intricacies of lines.

Monograms on nails in everyday life require modest, discreet outfits, matching the color palette of manicure or 1-2 tones lighter (darker). Make-up accents (eyes or lips) are acceptable, but in this case, accessories, like clothes, should fade into the background.
If you are a creative and eccentric person, you like to stand out from the crowd, the territory of possible combinations of manicure and wardrobe is limited only by your imagination, which, we hope, still lies in the plane of good taste.
In any case, be prepared for the sidelong glances of people who subtly feel harmony and categorically do not accept such treatment with it. But that's good modern fashion, which can always be casually noticed: this is a trend. And all claims will be removed.


