How to draw a folk holiday Easter. We create together: how to draw Easter and what else you can draw for Easter
Every year after the end of Lent, Orthodox Christians celebrate Easter, the brightest and most joyful holiday. It is customary to prepare for this important event in advance - through prayers and repentance, spiritual and physical cleansing. Children are especially looking forward to Easter, for whom these wonderful days filled with fun games, entertainment and symbolic gifts. In addition, on the eve of the great holiday, kids make handicrafts from improvised materials and draw beautiful drawings on the theme of Easter. How to draw a picture for Easter? We picked simple master classes with a photo on creating drawings with a pencil and paints for children - with the help of our lessons, children will be able to gradually master the basics of this type of fine art. Most best work can be submitted to the competition of children's drawings in kindergarten, school, or simply give to relatives and friends for Easter.
Beautiful drawing for Easter - a simple master class for children with step by step photos
Kulich is considered a traditional Easter cake, symbolizing the presence of God in this world and His care for all people. On Easter, it is customary to send holiday cards to each other with the image of Easter cakes and painted eggs - with kind words congratulations and wishes. We bring to your attention a simple master class for children with step by step photos on the theme "Easter cake", having mastered which you can draw a beautiful picture and please your parents with a touching gift.
Necessary materials for the master class of children's Easter drawing:
- white paper A4
- black gel pen
- simple and colored pencil for coloring
- eraser
A step-by-step description of the master class on creating an Easter cake drawing, with a photo:
- On a sheet of paper, draw a medium-sized square.

- We draw a rounded line above the square and draw the same one from below.

- To the upper arc, you need to draw another one and connect them into an oval - this is the top of the future Easter cake.

- We draw a candle in the center of the top, and at the bottom we add a few thin lines, indicating a napkin for the Easter cake.

- Near the Easter cake we draw willow twigs - with stems and buds.

- Now we “apply” on top of the Easter cake white icing with smooth curved lines.

- We trace the drawing along the contours with a black gel pen, not forgetting to depict “powder” on the surface of the cake - in the form of small circles.

- Use the eraser to erase the extra lines.

- It remains to color Easter cake colored pencils and our drawing is ready! For children, it is quite possible to draw such a symbol of Easter, showing a little perseverance and diligence.

Children's drawing for Easter to school with a pencil - a master class in stages for beginners, with a photo
Colored eggs are one of the main Easter attributes and ritual festive food. For Christians, an egg means rebirth, restoration, the beginning of a new life. According to tradition, on Easter it is customary to exchange bright krashanks with family and friends, as well as to conduct many important rituals. Many children's drawings depict multi-colored Easter eggs, decorated with ornaments and funny figures - here you can fantasize from the heart! With the help of our master class, drawing an Easter egg with a pencil will not be difficult even for novice artists. following carefully step by step instructions with a photo, children will be able to make a beautiful drawing for Easter with their own hands, which will take its rightful place in the children's art competition at school.
The list of materials for the drawing master class for Easter:
- sheet of white paper
- simple pencil - brand HB
- eraser
- colored pencils or markers
Description of the master class on drawing an Easter egg, step by step with a photo:
- To create a beautiful drawing of an egg, the main thing is to convey its shape on paper as accurately as possible. As " visual aid"You can take an ordinary chicken testicle. First, we draw a circle and “crown” it with the top in the form of a triangle with a rounded middle corner. The two sides of the triangle tightly "cover" the egg, forming a single whole. In this case, the diameter of the circle should be equal to the height of the triangle.

- The line separating the circle and the triangle is no longer needed for us - it needs to be erased with an eraser. It turns out an egg of the correct shape.

- Let's start decorating the Easter egg - lines, geometric figures, drawings. For example, draw smooth lines that expand from the top to the sides of the egg. Such transverse lines "cover" the egg, forming a funny "striped" pattern.


- We take colored pencils or felt-tip pens and color our Easter egg, creating a unique author's creation.

- The egg can be made solid, and then circles or other shapes can be drawn on the surface by painting them in contrasting colors. That's it, it turned out to be a cute Easter egg - a great hand-drawn gift for the Easter holiday.

Drawing for Easter in kindergarten with paints - a master class with step-by-step photos
Children's drawings reveal inner world little artist, his thoughts, experiences, emotions. On the eve of Easter in kindergarten drawing classes are held, where kids are happy to draw on paper with pencils or paints various Easter attributes - Easter cakes, colorful eggs, rabbits, chickens. Of course, the plots of such drawings are childishly cute and unpretentious, but they always fascinate with their touching purity and freshness of colors. Our master class step by step photos dedicated to the theme of the Easter holiday and is intended for older children before school age.
For a drawing on the theme of Easter, you will need the following materials:
- A4 paper
- simple pencil - HB
- colored paints - for coloring
Step-by-step instructions for a master class on drawing a children's Easter drawing, photo:
- On a piece of paper with a simple pencil draw the outlines of the glaze, trying to draw light thin lines.

- Under the “cap” of icing, we depict the Easter cake itself.

- Near the Easter cake we outline the contours of the eggs, one of which we “tie” with a bow.
In anticipation happy holiday Easter in kindergartens and schools, drawing competitions are held on Christian themes. It is very important that the child is prepared beautiful picture. If the child finds it difficult to choose a topic or cannot draw the main Easter symbols, help him. First, check out the article on Easter-themed drawings for preschool and primary school children.
What to choose for a drawing
The choice of Easter themes for crafts is quite wide: first of all, it is biblical stories . If the child is not familiar with them, do not try to hastily talk about the basic principles of Christianity: religious knowledge will come with time. Choose common and recognizable symbols for the drawing. These include:
- Easter cakes
- rabbits
- Eggs in a basket
- chickens
- Willow.
kulich
kulich- one of the easiest drawings to perform. That is why often children's work is full of familiar pastries of all colors and sizes. We will show a step-by-step drawing master class given element. Prepare your tools:
- Blank paper
- A simple pencil with an eraser on the tip
- Colored pencils, markers, paints.
Have your child sit at the desk. In no case don't draw on soft surfaces, on the floor or bed. Hand over the prepared materials and show by your example the correct execution of the drawing for Easter.
Draw with a simple pencil cake shape. It is a rectangle, the top of which ends in an oval.
 Fasten a candle with a cross in the middle of the oval. Draw on the top of the Easter cake letter designation phrases "Christ is Risen"- HV.
 Color it. For a crust, choose natural beige or brown colors, for a delicious crown - white. Don't forget to draw a colorfulypka.
 Willow
Drawing a willow is easy. At the same time, you can draw it with a preliminary pencil sketch or immediately with gouache. Check out phased creation Easter drawing.
Form a whole bunch of willow. To do this, start drawing soft smooth lines from the corner of the sheet. Follow to tips branches were turned in different directions.
 Add ovals on the lines. Oval size should be approximately the same, it is not necessary to observe the evenness of the lines.
 Add thin lines to the branches - this is fluff on the branch. Draw willow buds.


 Colorize willow with traditional colors: brown and black for the stem and white and yellow for the flowers.
draw willow without a sketch is even easier and faster. Use this option if you don't have enough time before submitting your drawing to the competition.
Take colored paper, put white spots on it according to the size of the brush. Connect them with a thin branch Brown.
 Easter eggs
To draw eggs with your own hands for Easter, you need to stock up on a simple pencil to create a sketch and colored ones for coloring. If the child is good at redraw from existing drawings, use the coloring page to offer it to your child as material for copying.
Let's start the drawing lesson
Draw a rectangle. Divide it in half with a vertical line. Visually divide the figure horizontally and, going down 1-1.5 cm below, mark the horizontal line. Create circuit eggs in the resulting frame: the widest parts of the testicle will be located at the intersection of the horizontal line with the lines of the rectangle.
 Draw smooth lines at the top and bottom. Draw zigzags.
 Decorate the Easter symbol with small circles and waves. Colorize in your child's favorite colors.

 Easter Bunny
Drawing a rabbit is a difficult and responsible business. To better understand the nuances of creating a beautiful Easter drawing, check out the video.
We hope that we have helped to solve the problem of choosing and creating a drawing on the theme of "Easter" for children. If you liked the material, we advise you to go to and see crafts from forarmina for the bright holiday of Easter.
Options simple drawings for Easter with children.
Simple beautiful drawings with children for Easter: from simple to difficult ways, drawings with a simple pencil or paints.
The end of Great Lent and the expectation of the brightest and most joyful holiday evoke an extraordinary state in the hearts of Orthodox Christians, which cannot be explained.
Enthusiastic feelings, an elevated feeling of grace on bright Easter days emphasize special holiday rituals.
Easter preparations start early. Christians pray, cleanse spiritually and physically. Congratulate on it important event relatives and convey sincere warm congratulations, you can use your own drawing, made in the Easter theme.

Children also look forward to Easter, during which the days are filled with special fun, games, entertainment and gifts.
Children can make some of these symbolic gifts with their own hands: for example, draw beautiful drawings with Easter cakes, painted eggs and willow branches.
Let's try to draw a picture for Easter. with the help of step-by-step photos, you will master the basics of drawing for Easter, and you will be able to present the result of your creativity to family and friends.
We will draw Easter cake- traditional Easter baking, which is a symbol of the presence of God in this world and his care for all people.

For drawing you will need:
- blank sheet of paper
- simple pencil
- colour pencils
- eraser
- black gel pen or marker

Let's start creating an Easter picture:
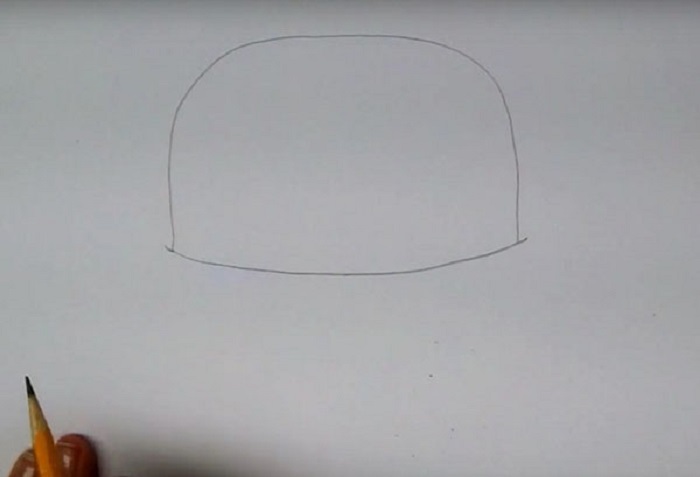
- On a piece of paper, let's mark the borders of the Easter cake with straight lines resembling a square in shape. You need to do this without pressing on the pencil, otherwise the drawing will look sloppy after all unnecessary lines are erased with an eraser.

- Let's draw the top and bottom parts of the Easter cake: draw rounded lines above and below the square.

- We draw another arc - under the upper curved line, connecting them into an oval. The top of the future Easter cake is almost ready.

- Let's draw a candle, defining the center of the oval and add the folds of the napkin on which the cake stands - draw a few curved lines right under the base of the cake.

- Let's draw willow twigs: draw a few curved lines for the stems, and then draw oval buds. Please note: closer to the top, the buds are small, and along the rest of the stem they are large.

- We “apply” icing to the cake: we draw smooth winding lines along the walls of the cake, which turn into teardrop-shaped outgrowths. We show the volume glaze under the candle with a small line.

- We draw in more detail the pits on the baking, draw a round "powder" in the form of tiny circles. We finish the hairs on the willow buds and draw one more line on the stems.

- We direct more dark color drawing outline. For this you can use gel pen or a marker.

- We remove the auxiliary lines.
- We color the Easter cake using colored pencils or felt-tip pens.

What else to draw with children for Easter? For example, here are such brightly colored eggs that are the main Easter attributes:


- Before you start drawing, you can explain to your child the meaning of Easter eggs: for Christians, this ritual festive food means the beginning of a new life.
- Hopes for rebirth and restoration are associated with the egg. One of the festive rituals is to exchange krashanki with friends and acquaintances.
- A child can paint a painted Easter egg with bright colors, decorate it with ornaments and funny figures. In this he will be helped by fantasy and perseverance.
- Thanks to our step by step master classes the child can easily prepare a beautiful colorful drawing on the theme of Easter. The options proposed here will help your child take a worthy place in the competition of children's creativity at school or kindergarten.
- You just need to carefully follow the step-by-step photographs and repeat all the lines exactly. And you can decorate the finished sketch as your heart desires.
For work you will need:
- landscape sheet
- simple pencil
- colored pencils or markers
- eraser
We will try to accurately convey the shape of the egg. To do this, we set ourselves the usual egg. It will serve as a visual aid for us.
- We start with a circle that will need to be “crowned” with a top: we draw a figure above the circle that resembles a triangle, but with a strongly rounded middle corner. The sides of the triangle are the contours of the circle.

Draw a circle and the top of the egg

- Erase the line separating the circle and the triangle with an eraser. We got an egg of the correct shape.
- We decorate the Easter egg: draw wavy lines, geometric figures. You can draw wide stripes that expand from the top to the sides, enclosing the egg and forming a funny "striped" pattern.


- With colored pencils or felt-tip pens, put on an Easter egg bright colors. The unique author's creation is ready!


- How else to paint an Easter egg? Decorate it with one color, and then draw dots, circles, stripes on its surface with contrasting colors.


Video: How to draw an EASTER EGG?
How to draw a drawing for Easter in stages and easily with a pencil for beginners and children?
Such a drawing can also be drawn by a child of senior preschool age, if the lesson is held under the guidance of an adult.
For work you will need:
- blank sheet of paper
- simple pencil
- colored pencils, paints or markers

- We put the initial lines on the sheet: this will be the top of the cake covered with icing.

- Draw without pressing the pencil. Add depressions and pits of the frozen glaze.

- Now let's finish the cake itself under the "cap" of the glaze.

- In the left corner we draw Easter eggs. To give the picture a festive look, we will “tie” one egg with a ribbon.

- We draw smooth lines a plate on which the cake stands.
- We refine the contours of the picture and direct them with a darker color. Add shadows under the glaze.

- We draw the contours of Easter eggs and shade some areas on the bow.

- We circle the outline of the plate with a dark color. We decorate the picture with bright colors.
Video: How to draw Easter cake for Easter - a drawing lesson for children from 4 years old, gouache, draw at home in stages?
We continue to draw on the Easter theme. Fortunately, the scope for imagination and creativity here is truly limitless.
A child can draw a basket of Easter eggs and decorate their work with bright cheerful colors. turn out beautiful gift for Easter, thanks to which the house is filled with an atmosphere of celebration.
- Let's start drawing a basket with the image of a circle in the middle of the sheet.
- Let's circle the rim from above, adding curved lines on one side - basket weaving.
- Let's draw grass.
- Draw three Easter eggs in the basket.
- The two curved lines are the handles of the basket.
- We decorate the picture with bright colors.

After watching the video, you will learn how to draw an Easter basket. The drawing is not complicated, because it can be used in the classroom in kindergarten or elementary school.
Video: Easter Basket
Do-it-yourself drawings for Easter with children to school and kindergarten
If, on the eve of the Bright Sunday of Christ, an exhibition of drawings on Easter themes is held in a kindergarten or school, then it will not be difficult to prepare a picture or postcard for the holiday with your parents.
Your child can present his vision of this bright holiday or make a drawing using step by step description below.
Drawing Easter bunnies with children:
- Let's draw four circles on a sheet of paper, arranged in pairs one on top of the other.

- The circles drawn on top are the heads of the rabbits, which should be larger than the circumference for the body. Draw two intersecting lines on the head.

- Let's draw in more detail the contours of the rabbits' heads. Let's add ears, perky bangs and details of muzzles.

- Let's finish the pupils, inner lines of the ears, antennae, eyebrows.
We draw the front paws and the contours of the tummy. - Now add hind legs. The rabbit on the right is holding a basket in its paws. Let's draw it, starting with a circle and specifying its shape.

- We add the missing details: the eggs in the basket, the heels of the rabbit, which lies on the left.

- The finished sketch is easy to “turn” into a handmade postcard if you decorate it beautifully and sign it.


How to decorate Easter Bunnies
Drawings for Easter with paints for the competition
You can convey the atmosphere of the holiday of resurrecting life with the help of an Easter still life painted with paints.
We will draw Easter cake, colorful eggs and willow branches.
For work you will need:
- sheet of watercolor paper
- simple pencil (B or B2)
- eraser
- gouache or watercolor
- brushes
- palette or any other flat white surface (saucer or plain paper)
- masking tape

We fix a sheet of paper vertically with masking tape. Approximately we outline with a simple pencil (without pressure) the location of the Easter cake, a vase for willow and colored eggs.
- We divide the sheet into upper and lower parts and draw a horizontal line just below the middle line of the sheet. This will be the edge of the table. Let's draw a rectangle on the table, placing it not in the center, but slightly shifting it to the left side.

- We draw in the right half of the sheet and a little higher one more rectangle: narrow and small. We finish the edge of the plate with Easter cake. We remove the extra pencil lines (the line of the table and the lines inside the objects) so that they do not interfere with us when drawing.

Draw the line of the table and the edge of the plate
- We erase the upper corners of the rectangles with an eraser and refine the contours of the Easter cake and the vase.

- We take round objects of a suitable size and begin to draw eggs located around the Easter cake. The nearest Easter eggs are depicted larger in size than the distant ones.
- We draw the contours of the eggs, the edges on the vase and add the icing on the cake.

- Now you need to draw a candle. In order not to complicate our task, we simply put a simple pencil on the top of the cake and circle it, adding a small light on top.

- We draw a plate under the Easter cake. We fill the empty space of the lower right part of the sheet with a large Easter egg.

- We finish the willow twigs, correcting or shortening, if necessary, the top of the candle.

- Add buds on willow branches.
- We write on the nearest egg two letters "ХВ", meaning Christ is Risen.

- We draw a pattern on Easter eggs.

- We take paints and start decorating our Easter picture.
- We paint over the Easter cake with a light beige color with the addition of a sandy yellow tint.
- Add some blue color to the tint of the cake.

Coloring the icing and adding a yellow candle light
- We are preparing a suitable shade for painting over a candle and partially an egg. It could be ocher paint.

- some pink and blue color add to frosting. in yellow paint over the flame of the candle. We draw light in a circular motion.

- We paint the background with soft blue and turquoise colors.

- Let's go through the same color along the contour of the willow branches.

- Adding yellow to the flame of a candle.
- We collect alternately pink paint, diluted with water, orange and fill the background on the left.
- We paint over the surface of the table, allowing the colors to mix.
- Coloring Easter eggs. To make the picture more picturesque, we use red, red-orange and red-brown tones for some eggs.
- We draw purple shadows on the table, under the egg and under the willow.
- We begin to paint over the vase with a neutral blue color. We add a little yellow color.
- We decorate the willow, showing tousled small fluffy inflorescences.
Draw a pattern on Easter eggs, add shadows


Video: Video lesson Draw Gouache Easter Bunny
Easy ways to draw pictures for Easter.
Bright, festive Easter days evoke an extraordinary state of enthusiastic feelings and a sublime feeling of grace. It is impossible to explain this in simple human language. For this, there are appropriate festive rituals that further emphasize the greatness and solemnity of this day.
To congratulate on a bright Easter day, and to convey true, warm wishes, along with a piece of your soul, hand-made drawings of the corresponding subject will help.
What to draw for Easter with children?
This celebration is associated with mouth-watering Easter cakes, bright eggs and green willow.
Drawings with children should be not difficult, but interesting.
painted egg the most important attribute of Easter.
It will even be possible to draw him together with his parents 3 year old kid.
Drawing for Easter with a baby
An equally important symbol of the holiday - Easter cake.
A very simple option you can try to portray with older children.

 Candle and easter drawn by children with parents
 A more complex option with which Easter is inseparably connected - temple or church. This option will take a lot of time, will require certain skills and patience.

 Easter symbol on an image made by a more experienced little craftsman with mom or dad
 In addition, you can draw:
 Simple still life gouache
  Kind bunny with dye
 Simple Easter and eggs with paints
 Video: Draw Easter: Easter cake, eggs
How to draw a drawing for Easter in stages and easily with a pencil for beginners and children?
Begin the first steps of drawing from the most basic details.
Let's choose for example a simple basket with colorful eggs.

 Easy drawing for Easter for beginners
 Preparing for work:
- Pencils and colored pencils
- A4 sheet of paper
- Eraser
- Black marker
Let's move on to creativity:
- Visually divide a sheet of paper in half
- In the upper part we make the contours of the basket handle - a rectangle with soft corners

- Add a sketch of the base of the product. It will be a figure similar to the previous one, but a little wider.


- We make basket weaving vertical and horizontal lines to get wide cells
- We finish the second line at the contour of the handle


- Decorate the handle with a bow


- Filling the basket with eggs
- We place the semi-ovals in any position until they occupy all the free space


- We bring to clarity all the sketches with a black marker
- After the marker dries, erase the extra pencil lines with an eraser.

- Adding brightness to a drawing with colored pencils
Video: How to draw an Easter egg?
Do-it-yourself drawings for Easter with children in kindergarten and school
Children love to create on one's own. The main thing is not to interrupt this initiative from them. Even if these drawings at first are not quite perfect.
soft, fluffy easter bunny wants, and can try to draw any novice artist.
To start we do schematic sketch of a figure:
- Head and body
- A circle on the tummy (hereinafter it will be a basket)
- We divide the muzzle into 4 halves (shift the cross to the upper left corner)


Now step by step fill in the base:
- We draw the head, bangs
- Adding perky ears
- Sketching funny eyes, nose, antennae, mouth
- The bunny should have fun jumping. We draw paws
- The rabbit has prepared a festive basket with gifts for friends - add an accessory
- Fill it with eggs
- Now let's sketch the tail
- Add fur on the tummy

- Erase extra lines
- Let's start coloring. Paints or colored pencils, as desired
 Children's creativity for easter
 Drawings for Easter with paints for the competition
Paint for competition fine arts- a very crucial moment.
After all, the task is not just to draw a picture, but also to put it on public display.
Since the topic is known to us, the task is made easier. Knowing the main attributes associated with the celebration of Easter, we choose them for the competitive drawing.
- First of all, we make sketches of Easter. This will be the main object of our creation.
- We wrap the cake with a beautiful ribbon
- We decorate with a flower
- Adding sketches of the tablecloth on which Easter settled
- We make all the contours with a simple pencil, slightly noticeable
- We outline the outlines of Easter eggs, willow branches
- Basic silhouettes made
- Remove extra lines with an eraser


Next stage - work with paints.
- Coloring the base of Easter in light brown


- When the watercolor dries, apply the next layer.
- To do this, dilute the previous color with water, tint the base and the creamy part of the cake, as shown in the figure.
- Then we add a blackout on Easter with a red-brown tint.
- On the protein decoration of Easter we make dark pink blotches


- We color the ribbon pink, diluted with water
- We give the flower an ultramarine tone
- Strengthen the shadow at Easter


The turn has come background design.
- We color: the upper half of the still life in a blue tone, and the lower half in a mixed blue and aquamarine tone
- Next, fill the twigs and Easter eggs with the selected color.

 Original, creativity to participate in the competition
Video: Video lesson: “We draw the Easter Bunny with Gouache! "
Everyone, even a novice artist, can have your vision of the holiday.
It is not necessary to take as a basis for the drawing regular attributes Easter. Maybe it will be yours personal feelings, different from the usual. The main thing is to draw a picture from pure heart with love and faith into this sacred tradition. Then anyone who sees your drawing will understand what emotions I wanted to convey this drawing to the artist.

 Easter fantasies
 Video: How to draw a hare for Easter?
Drawings on the theme "Easter" is a great opportunity for children to master the technique of creating a classic still life. Therefore, schoolchildren can already be offered to make drawings with their own hands - for school-age children, still life is an integral part of the general educational program.
We will make sure that we get beautiful drawings that are not boring. You can bring a basket, Easter and eggs to school to help recreate desired image. You can do without nature.
As usual, the creation of a picture begins with the design of the background. We take a white sheet of thick paper (for watercolors or sketches) and fix it on an easel. You can do without an easel, putting the sheet on the table.

The first task that the child has to cope with is to draw a basket with a simple pencil. We begin to draw it with four ovals located in parallel planes. They differ in size, repeating the contours of the basket. Then the side walls are drawn and that part of the ovals that we cannot see due to the fact that it is hidden by the bars is erased. After that, the rods themselves and the handle are drawn.


Considering that the drawing is created by children, you can slightly deviate from the requirements that apply to a still life and revive the picture with a cheerful character -.

Our sketch is ready!
Now it remains to fill it with color, taking into account the distribution of light and shadow. The basket turns brown.

Easter - pale yellow-beige.

Their tops are white.

The bow becomes the same snow-white.

And three testicles that lie next to the basket.

The rods of the basket are drawn with a dark brown felt-tip pen.

The back of the chicken is lightened with white.

And then turns yellow.

The whole chicken is covered in yellow.

And with the same paint dots are applied to the bow and patterns on.

We draw the details with pencils.

And we highlight the bow and Easter eggs with bright colors.

Now the most interesting thing - we take a real topping for Easter cakes.


